Push Notifications with Titanium and Firebase
In this blog, I hope to give you a basic knowledge on how to implement push notifications with appcelerator titanium and firebase. Firebase is a platform that offers various services for both mobile and web applications that help developers build apps, with many features, quickly.To send notifications, we will use the service called Cloud Messaging, which allows a user to send messages to any device using HTTP requests.
To send push notifications, Appcelerator Mobile Backend Services rely on Google Cloud Messaging (GCM) or Firebase Cloud Messaging for Android applications, and Apple Push Notification (APN) service for iOS applications. Firebase Cloud Messaging (FCM) is the new version of GCM. To use these services in your Titanium application, you first need to enable either FCM or GCM or APN for your application, and then configure Mobile Backend Services with information about your push service. This guide walks you through the process of creating and configuring push services for your application.
How to setup a project to send and receive push notifications
Setup Titanium Studio
01. Open Titanium Studio
02. Create new project - At the top of the screen click on File > New > Mobile App Project > Alloy > Default Alloy Project then click next
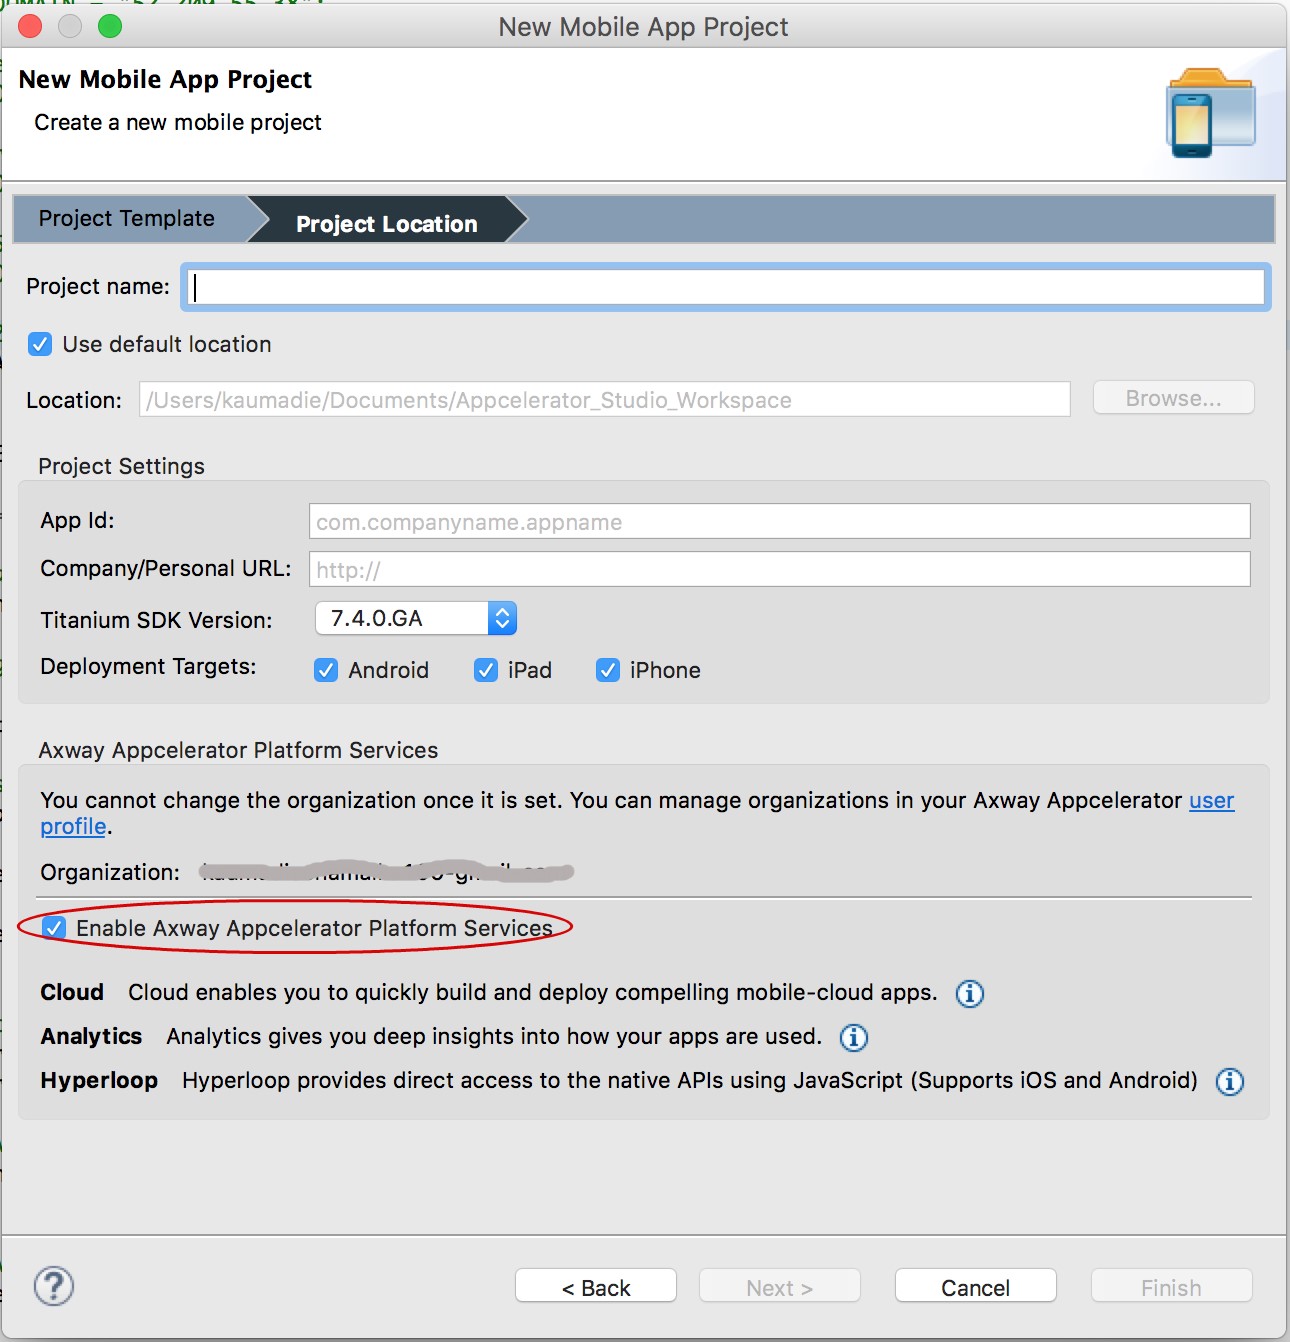
- ● When creating a new application in Appcelerator Studio, make sure the Enable Appcelerator Services checkbox is enabled
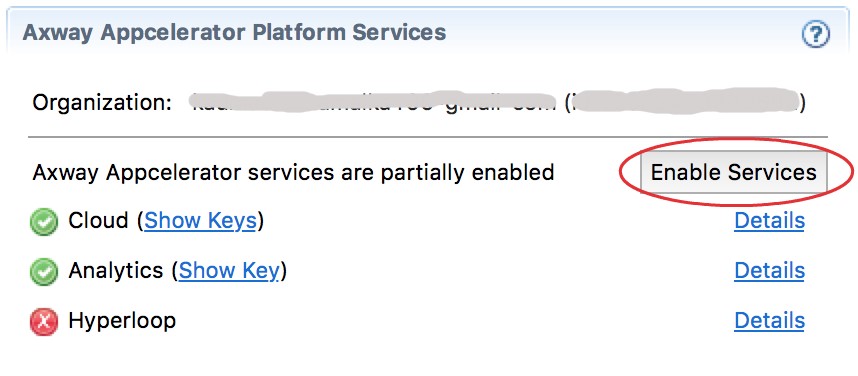
- ● For a previously created project, open your tiapp.xml file, then click the Enable Services button under the Appcelerator Services section
Update manifest
Merge the following keys to the
Setup Firebase
First of all, you need to have a Firebase account and you’ll need to create a new project within it.
How to create firebase account and project :
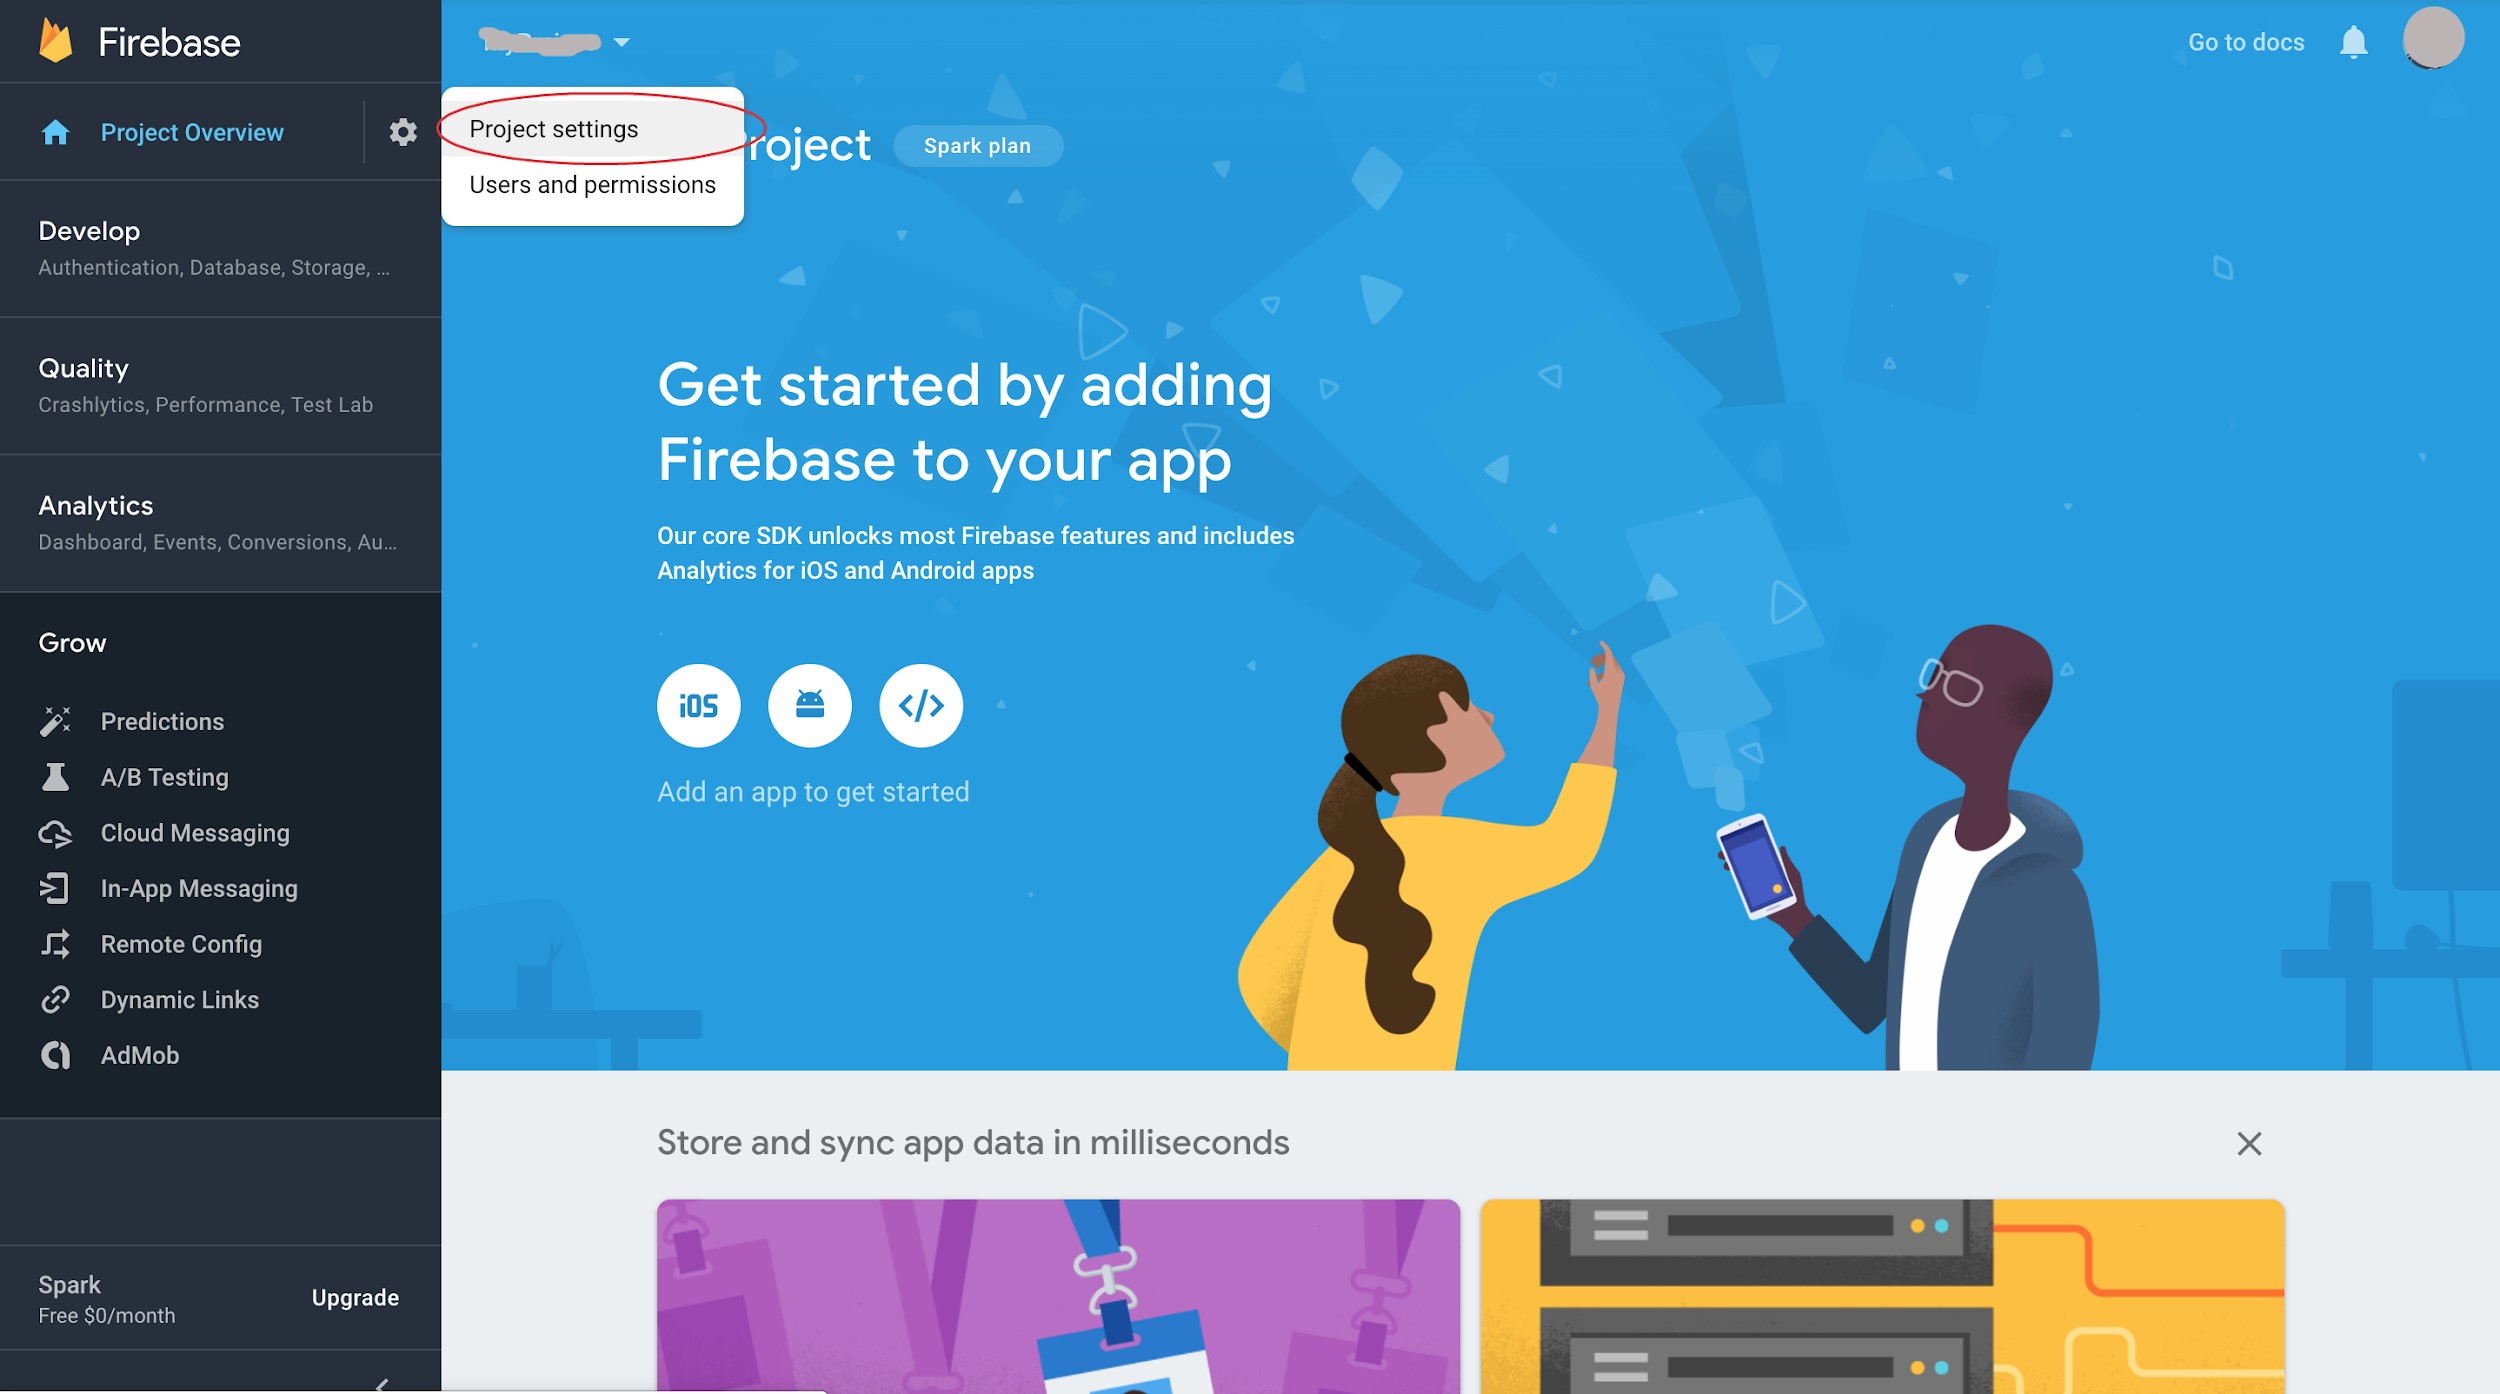
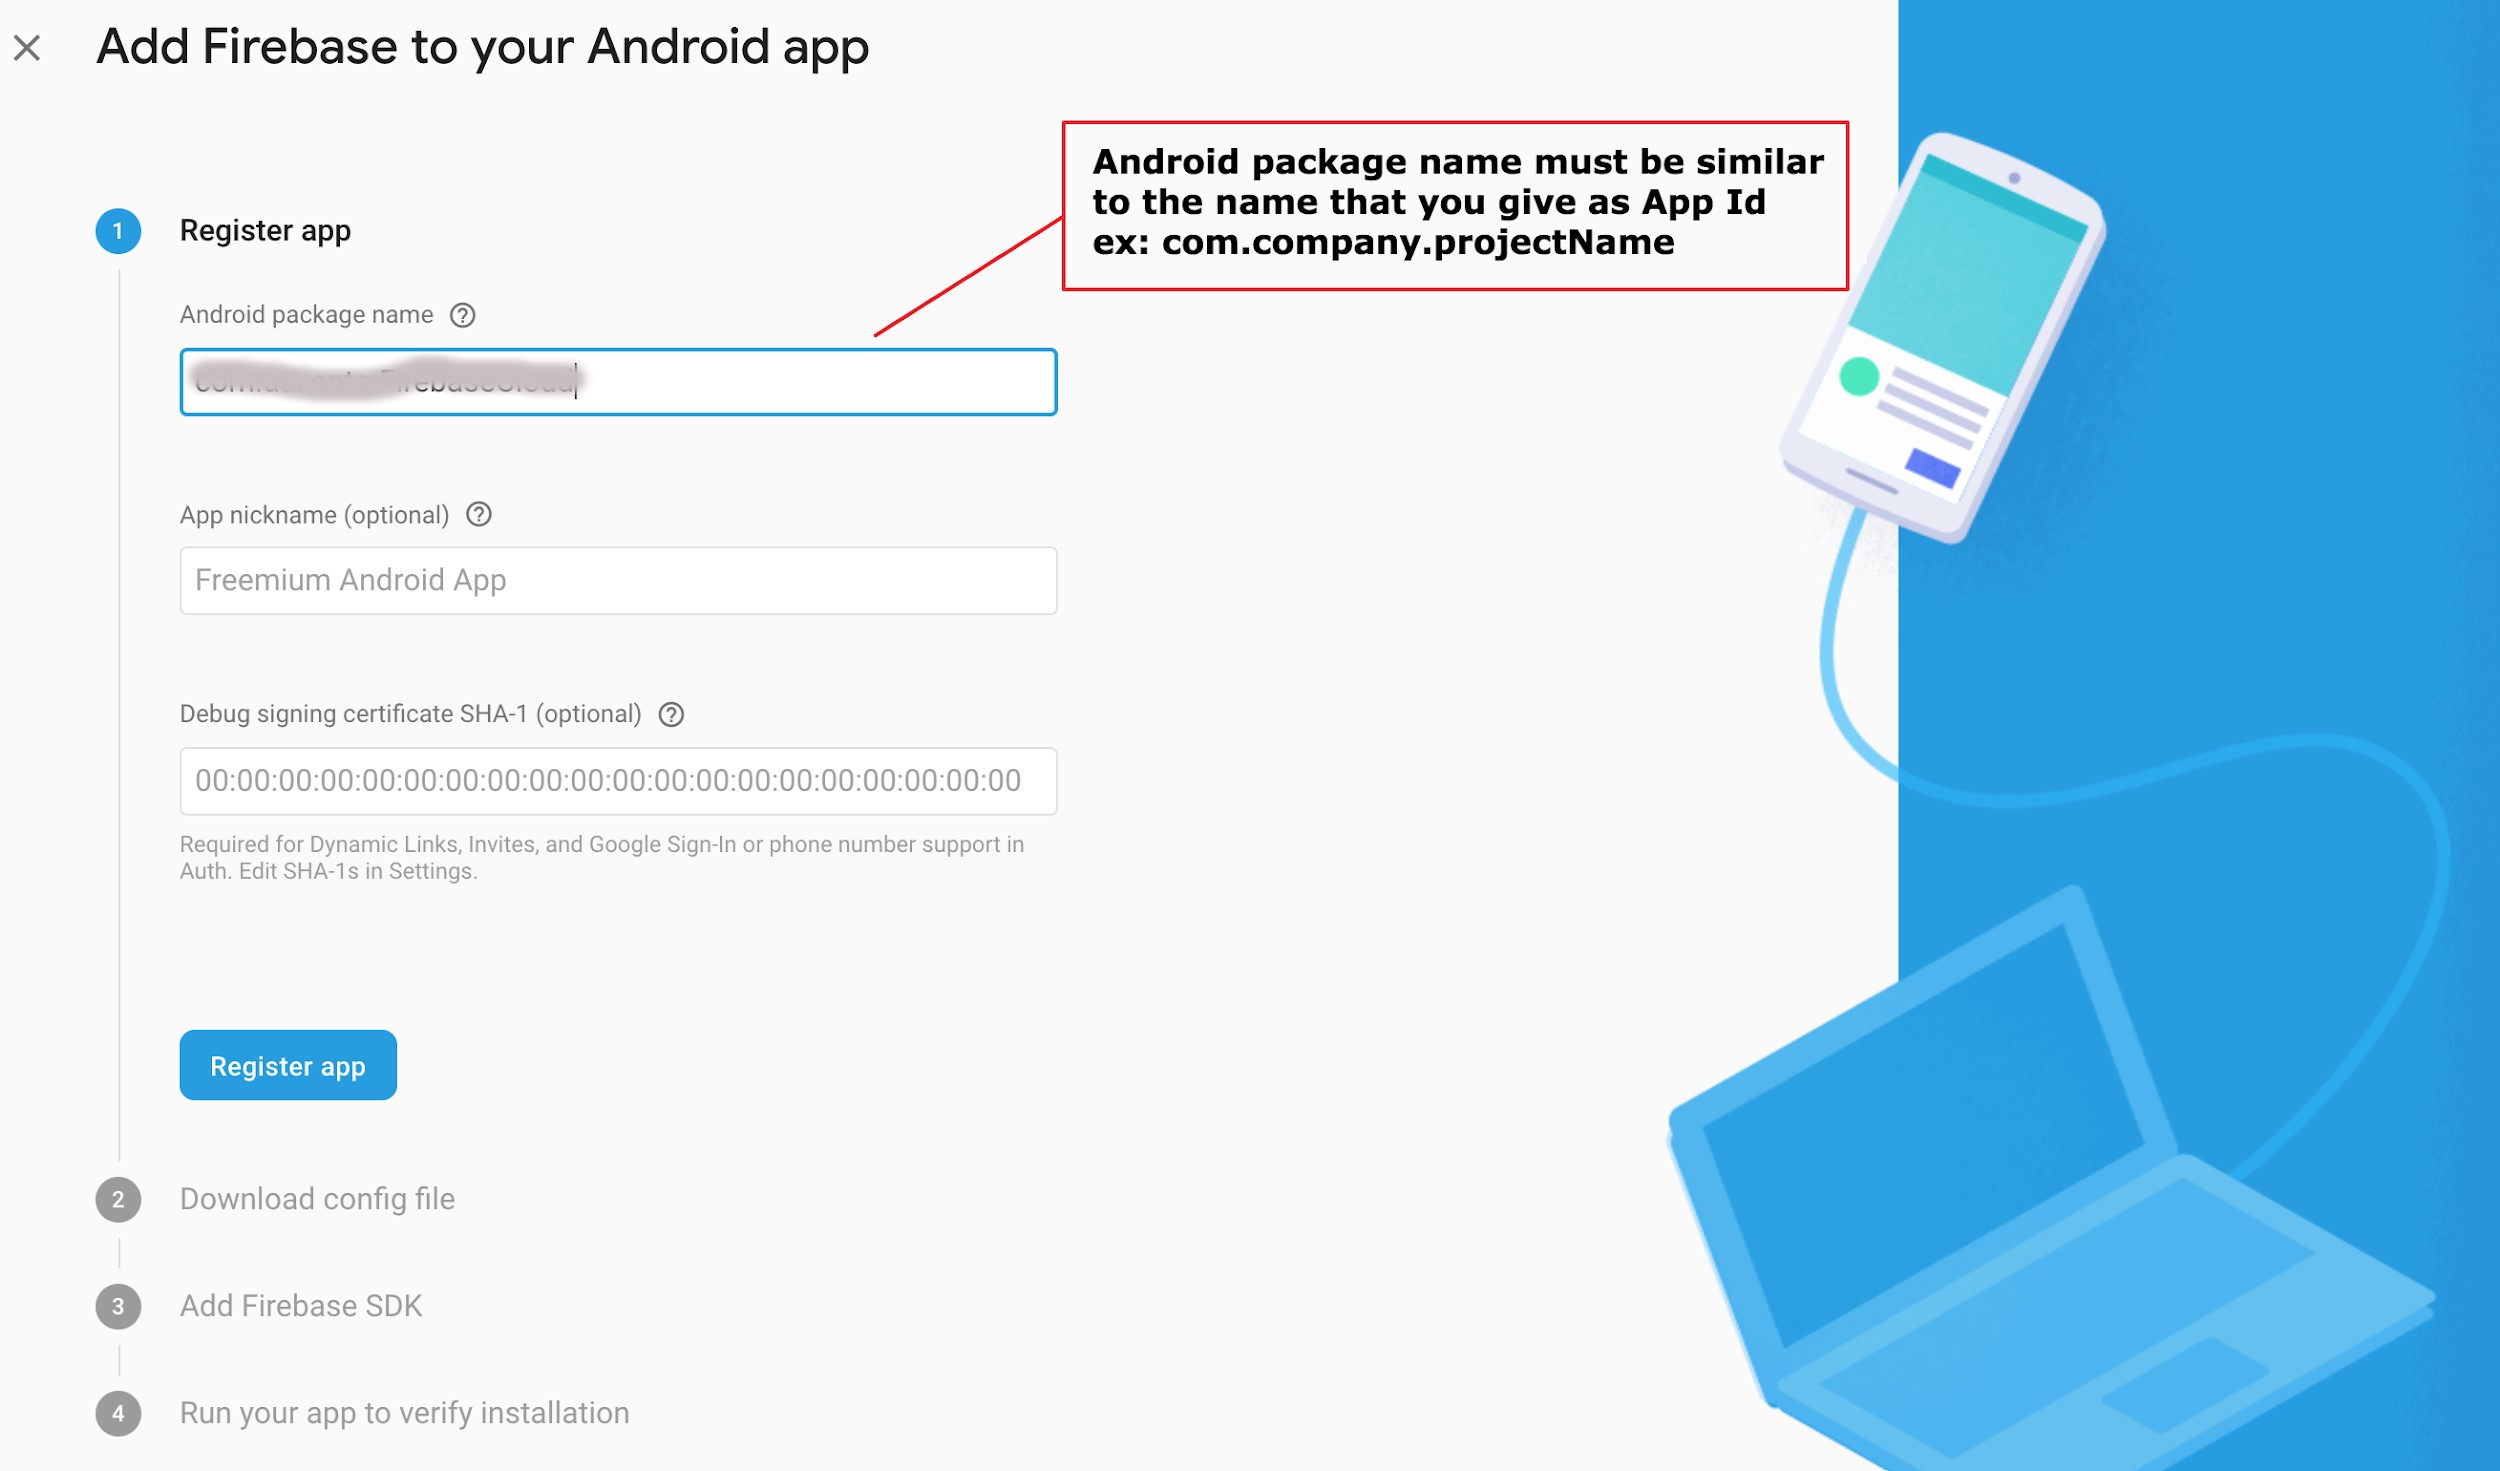
https://help.appsheet.com/manage/white-label-native-apps/creating-a-firebase-accountThen select your project and go to Project settings > click Add Firebase to your Android app > enter Android package name > tap Register app button > download the google-services.json file.
Note : follow similar steps to Add Firebase to an iOS app and download GoogleService-Info.plist file

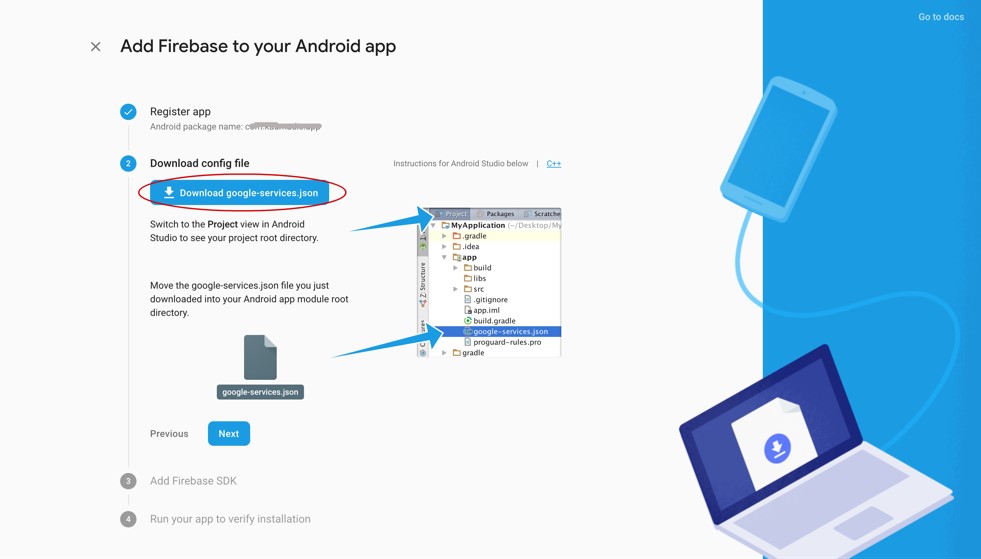
Requirements to implement push notifications to your Alloy project
01. Android: Download the google-services.json from your project and copy it to Resources (classic) or app/assets/android (Alloy)
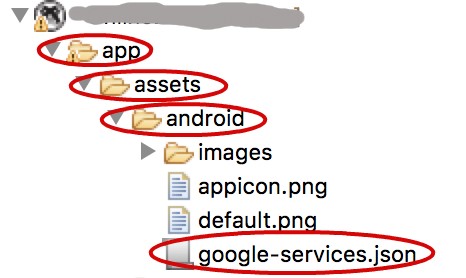
02. iOS: Download the GoogleService-Info.plist and copy it to Resources (classic) or app/assets/iphone (Alloy)

03. Download the core-module titanium-firebase-core
04. Download the Cloud Messaging titanium-firebase-cloud-messaging
05. iOS: Titanium SDK 6.3.0+
06. Android: Titanium SDK 7.0.0+ and Ti.PlayServices
Note: How to add modules to your project will be described in the below section of the blog.
For a push notification to reach the user, the user (or device) must be subscribed to receive push notifications on one or more notification channels. The application must also obtain a device token, which permits Mobile Backend Services to communicate with the push service provider (Google Cloud Messaging, Firebase Cloud Messaging or Apple Push Notification). This guide explains how to obtain a device token and how to use the Push Notifications API to manage your user's notification subscriptions.
Obtaining a device token
Need of a device token
When sending a push notification, the server uses tokens as “addresses” to deliver it to the correct devices. In your app, you would now send this token to your server so that it could be saved and later used for sending notifications.
To receive push notifications, your application first needs to obtain a device token. To obtain a device token:
- ● On Android, call the CloudPush module's retrieveDeviceToken() method or firebase.cloudmessaging module’s registerForPushNotifications() method
- ● On iOS, call the Titanium.Network.registerForPushNotifications()
Once your application has obtained a device token it should save it for later use.
Obtaining a device token on Android
To obtain a device token from GCM or FCM, first you need to add the CloudPush module to your project. This module is included with the Titanium SDK, but is not included by default in new projects.
To add the CloudPush module to your project:
In Studio, open your project's tiapp.xml file.
In the Modules section, click the add (+) button.

Select ti.cloudpush and click OK.
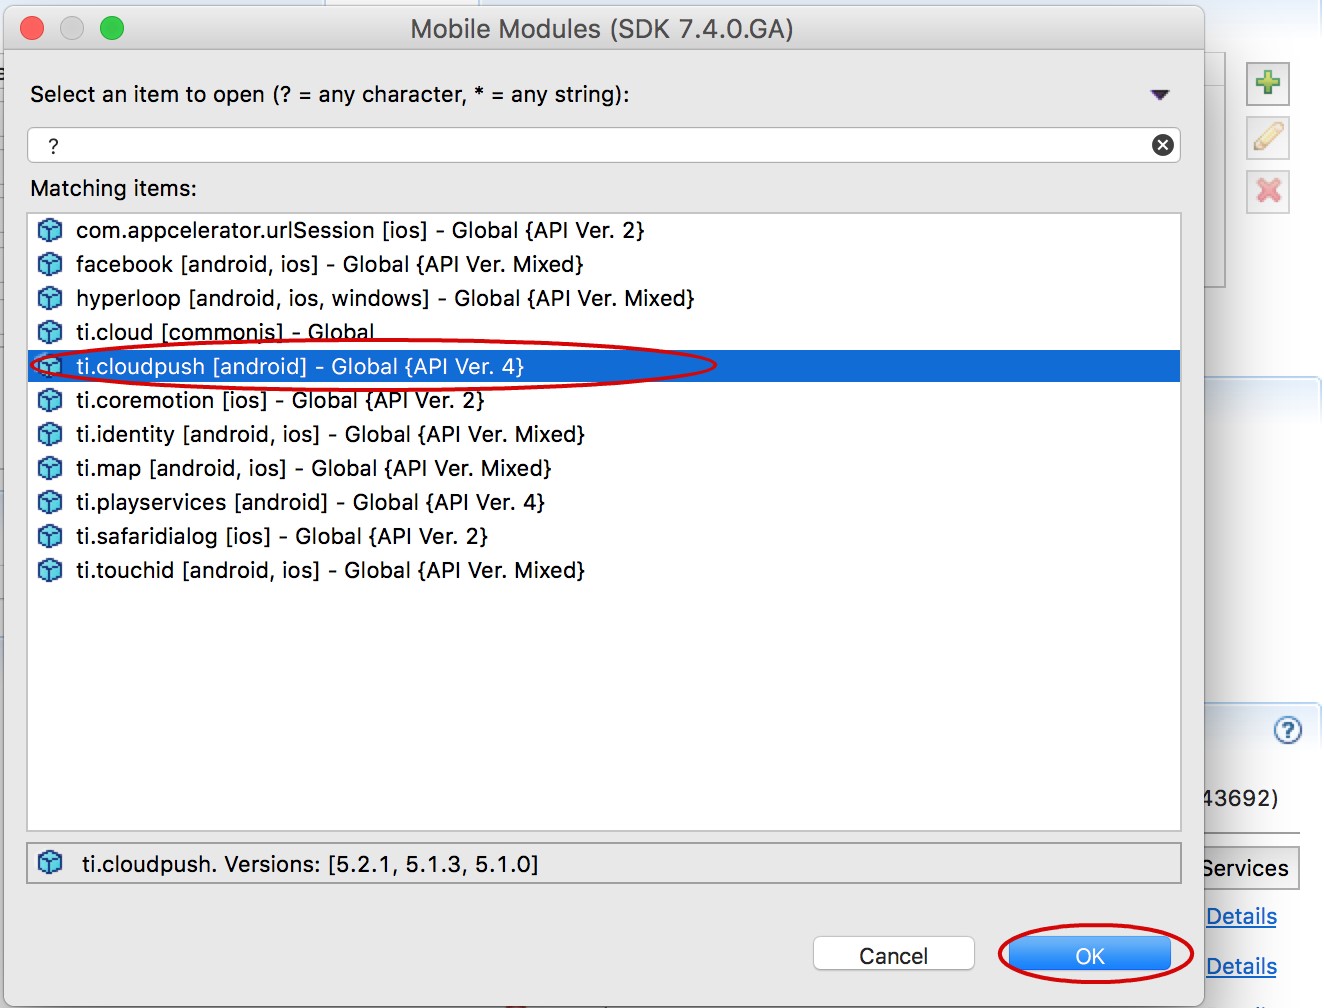
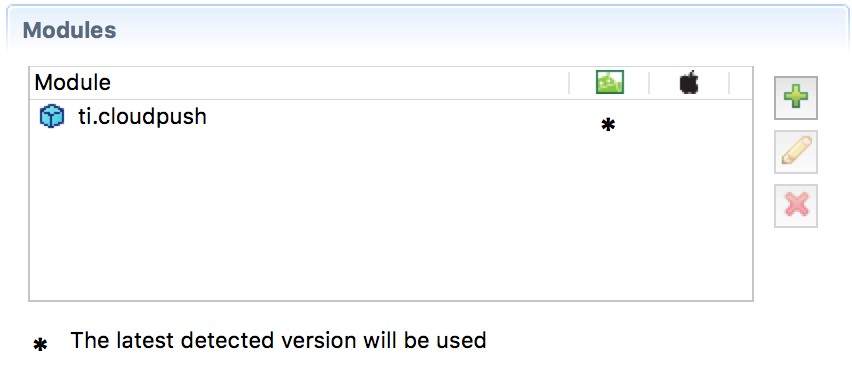
Note : Similarly, add other modules to implement push notifications.
Modules : ti.cloudpush, ti.cloud, ti.playservices
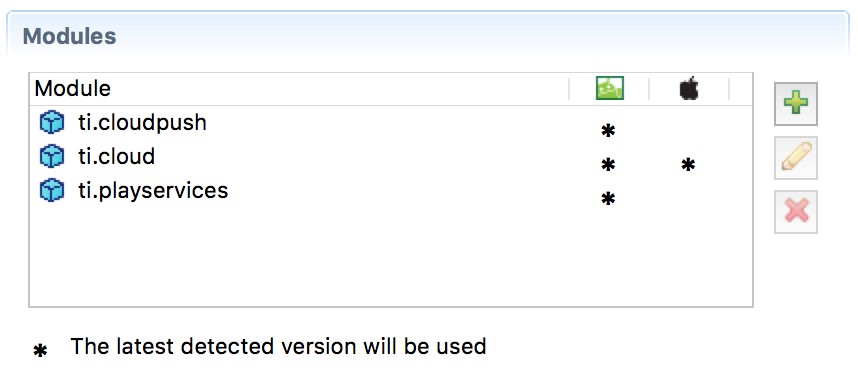
To add the downloaded modules to your project:
Downloaded Modules : firebase.cloudmessaging, firebase.core
1. Extract the downloaded zip files
2. Put the modules folder in the root of your application so it is on the same level as tiapp.xml
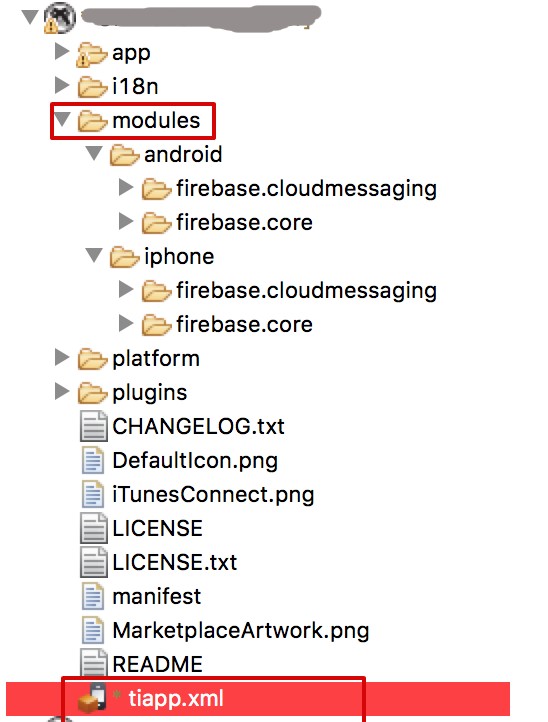
3. Double-click on the tiapp.xml file
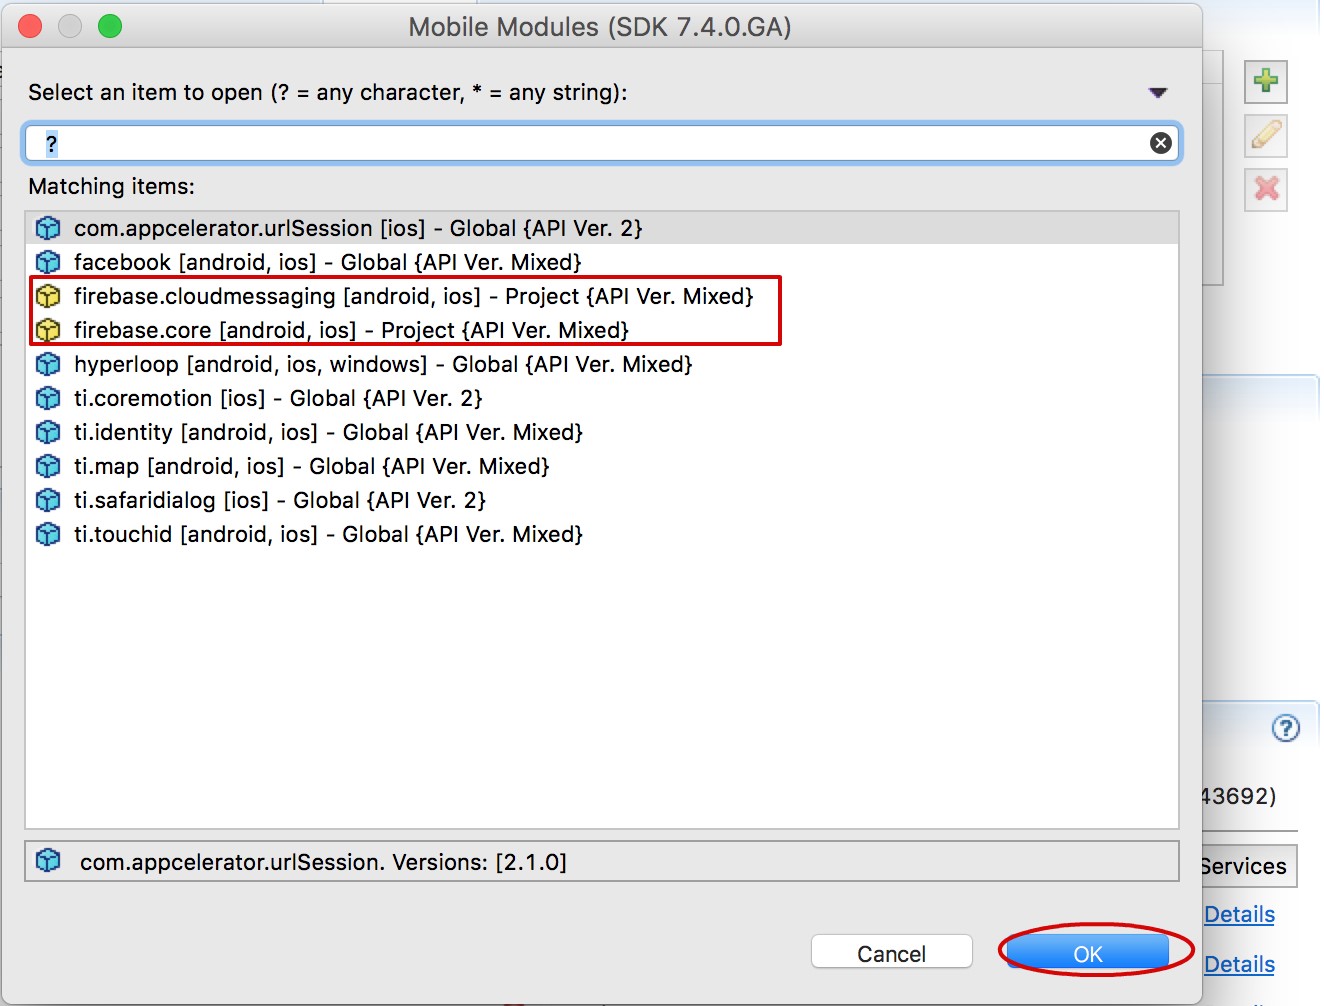
4. In the right-hand column, click the + to add a new module. It will show you a list of modules available in your global directory and in your project.
5. Select modules (firebase.cloudmessaging, firebase.core) and click ok

Setup Appcelerator cloud console
Configuring push services for Android devices
Once you've created a Google API project with FCM or GCM enabled, you need to update your application's settings page in the Dashboard with the API key and sender ID that you generated.
Getting started with the appcelerator Dashboard :
To configure the API Builder for push notifications using Dashboard:
1. Open Dashboard and select your application
2. Click Push Notifications on the left-side navigation
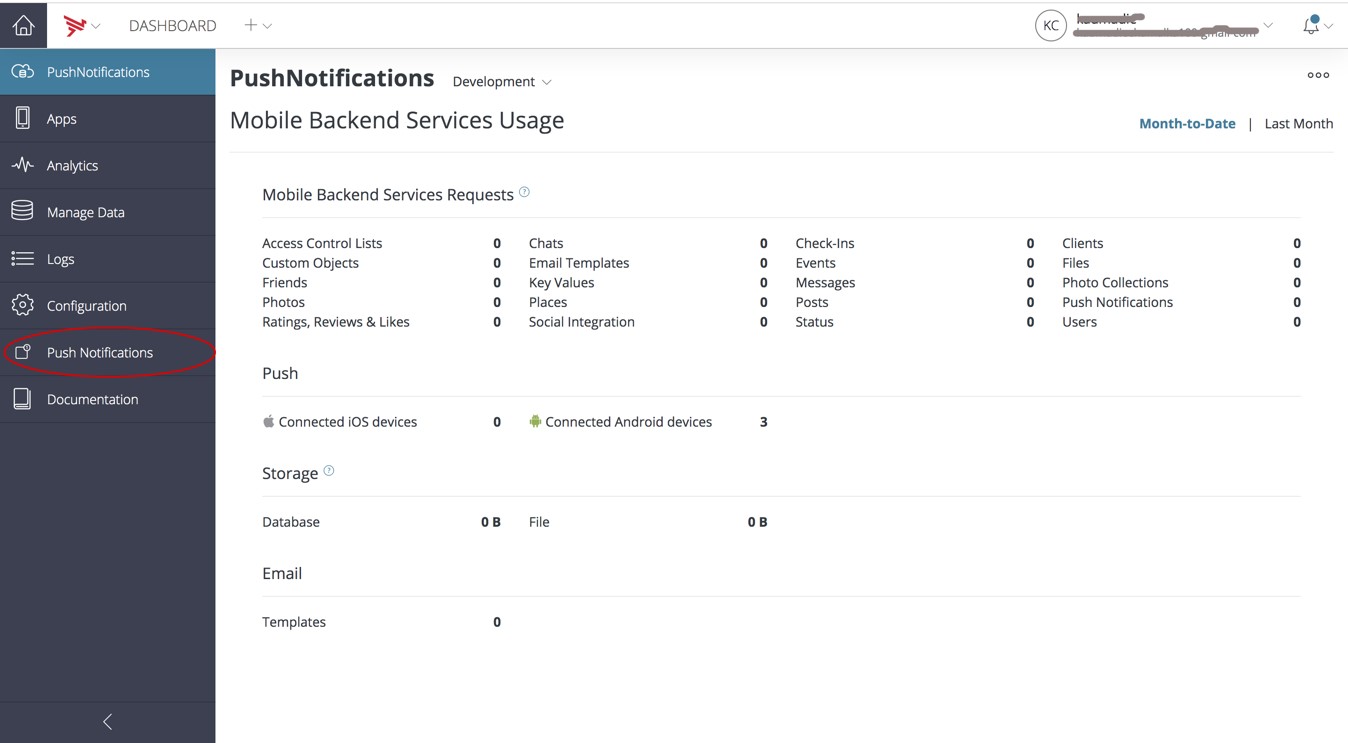
3. Select the Android tab
4. Enter the server key in the Server Key field and the sender ID in the Sender ID field. To find your Server Key and Sender ID, go to Firebase. From there, click on Settings (cog) > Cloud Messaging. This page will show your Sender ID (this should be the same as your project number) and your Server Key.

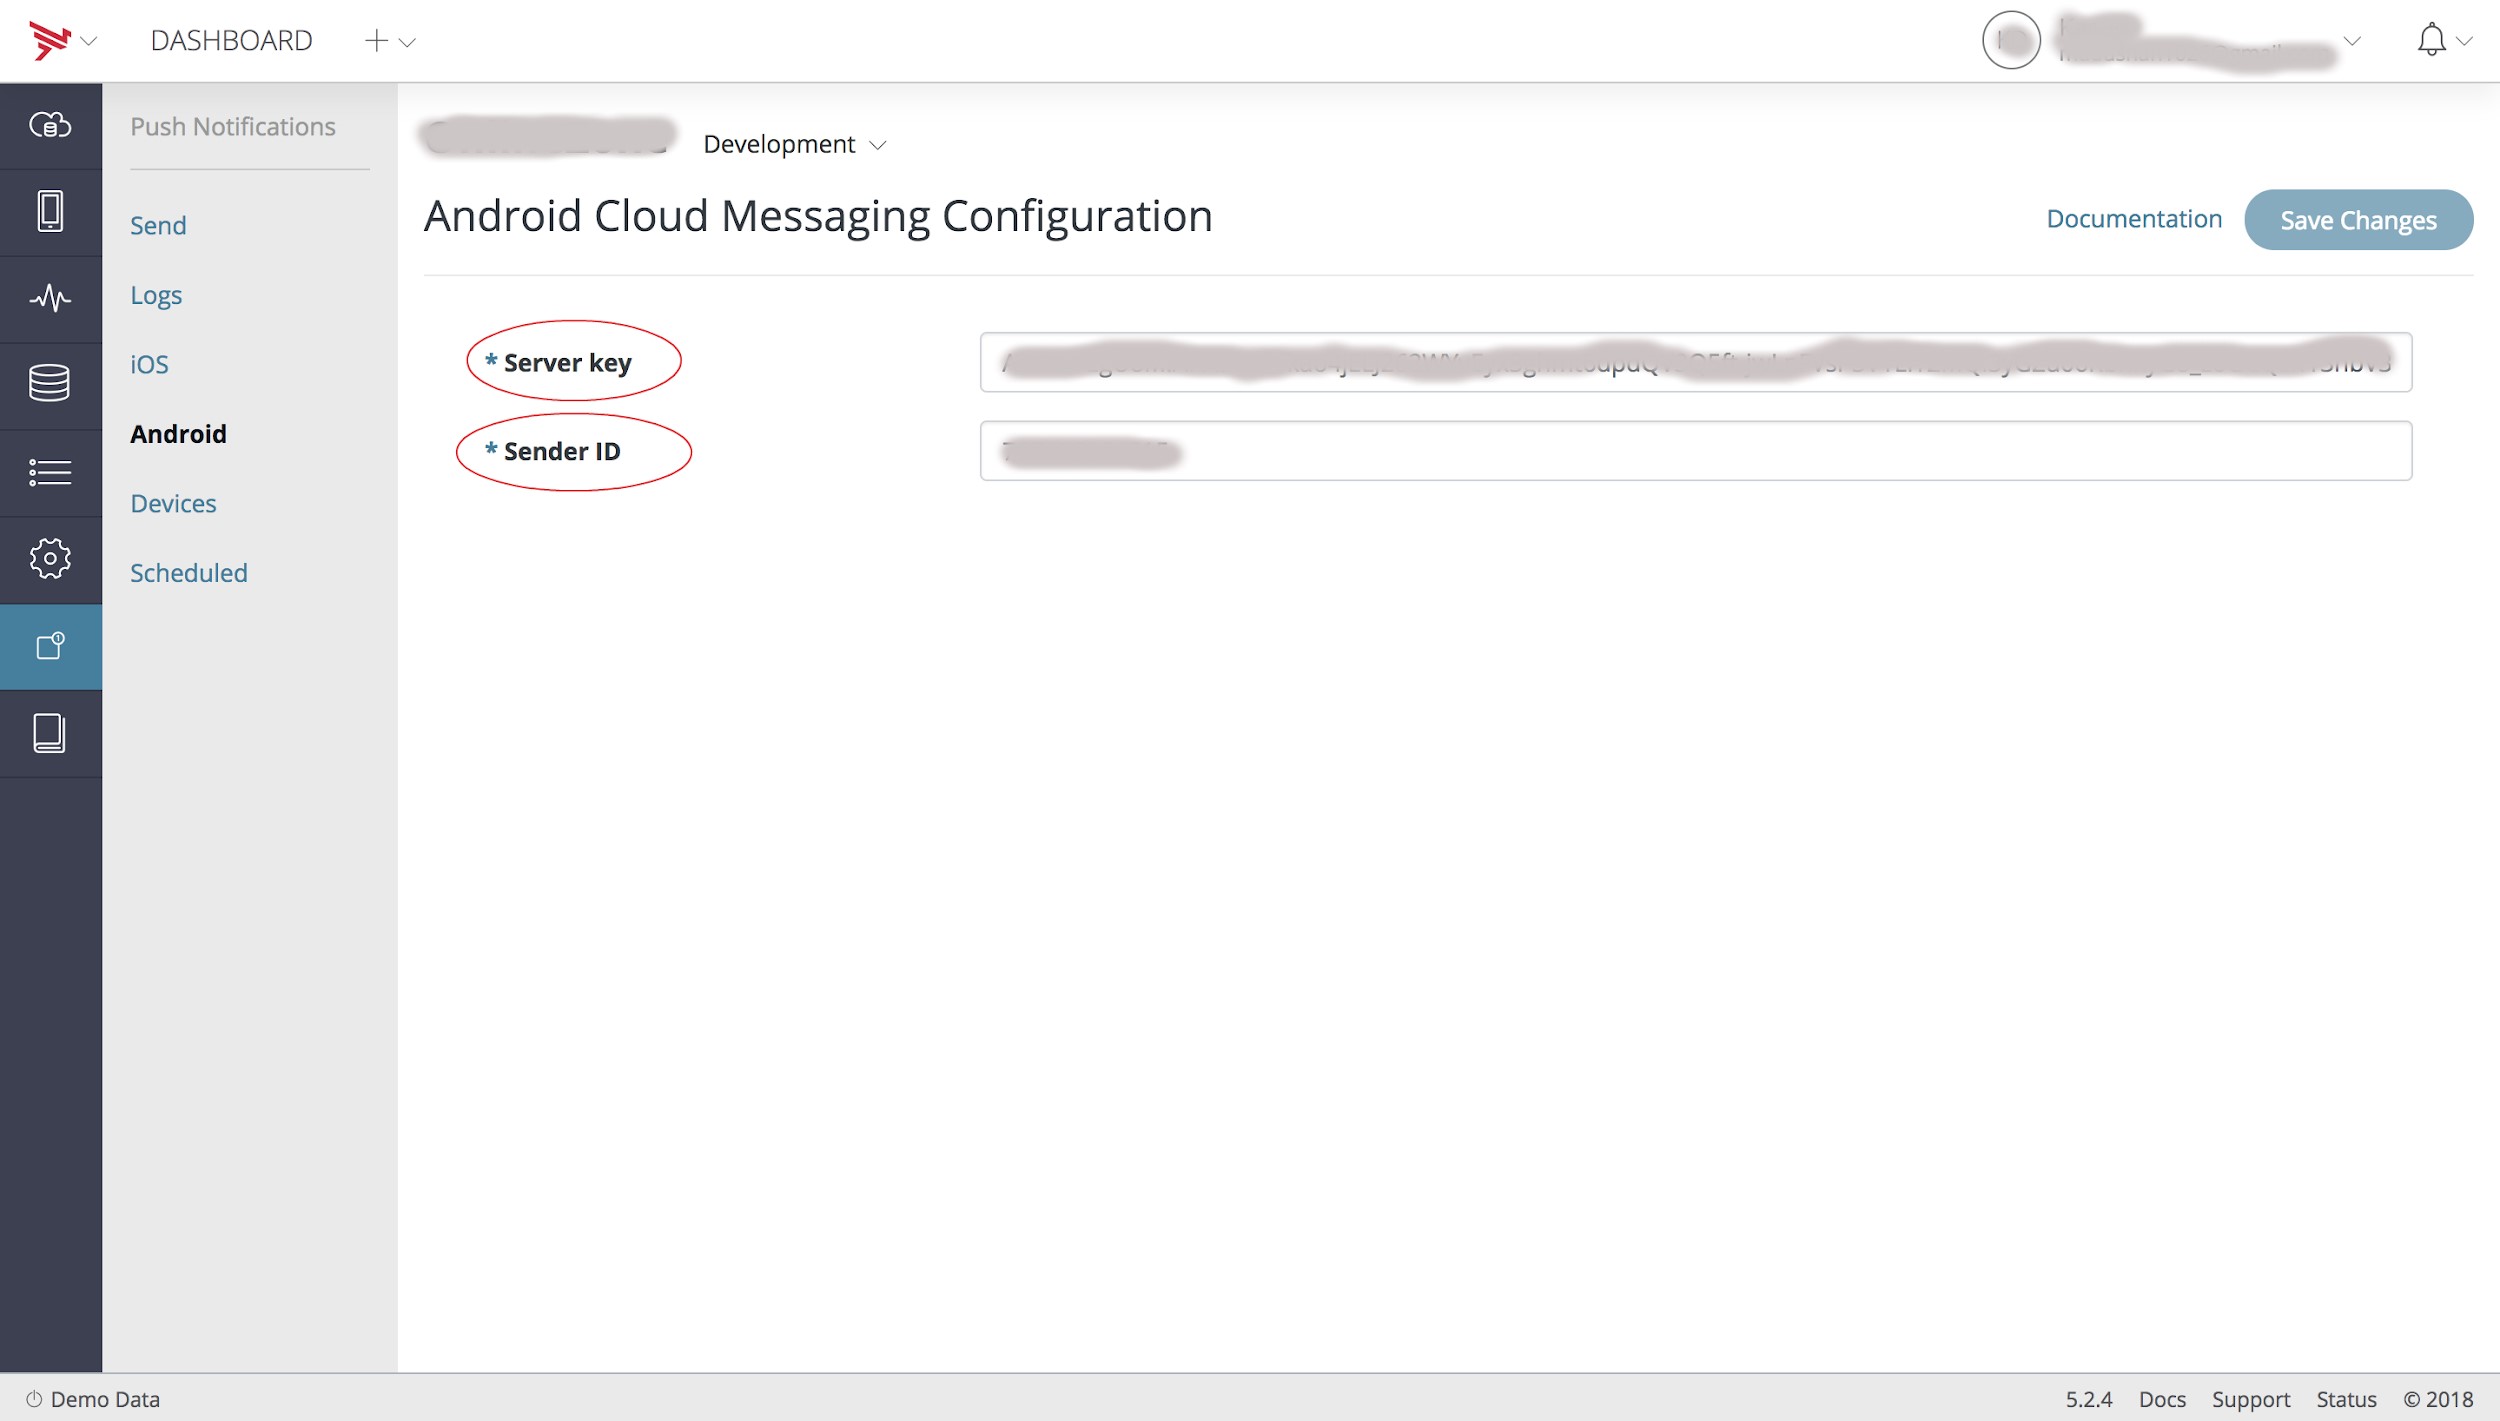
5. Click Save Changes
Configuring push services for iOS devices
To enable the Apple Push Notification service for your application, you need to create an Apple Push Notification certificate and upload the certificate to the MBS server. Note that, iOS simulators cannot receive Apple push notifications. Use Dashboard to upload the .p12 certificate file to the API Builder and enable notifications within your application.To upload the certificate using Dashboard:
1. Open Dashboard and select your MBS application from the Apps drop-down menu
2. Select Push Notifications on the left-side navigation
3. Select the iOS tab
4. Click Choose File, locate the .p12 file you exported previously, and click Open
5. In the Certificate Password field enter the password you selected when you generated the certificate
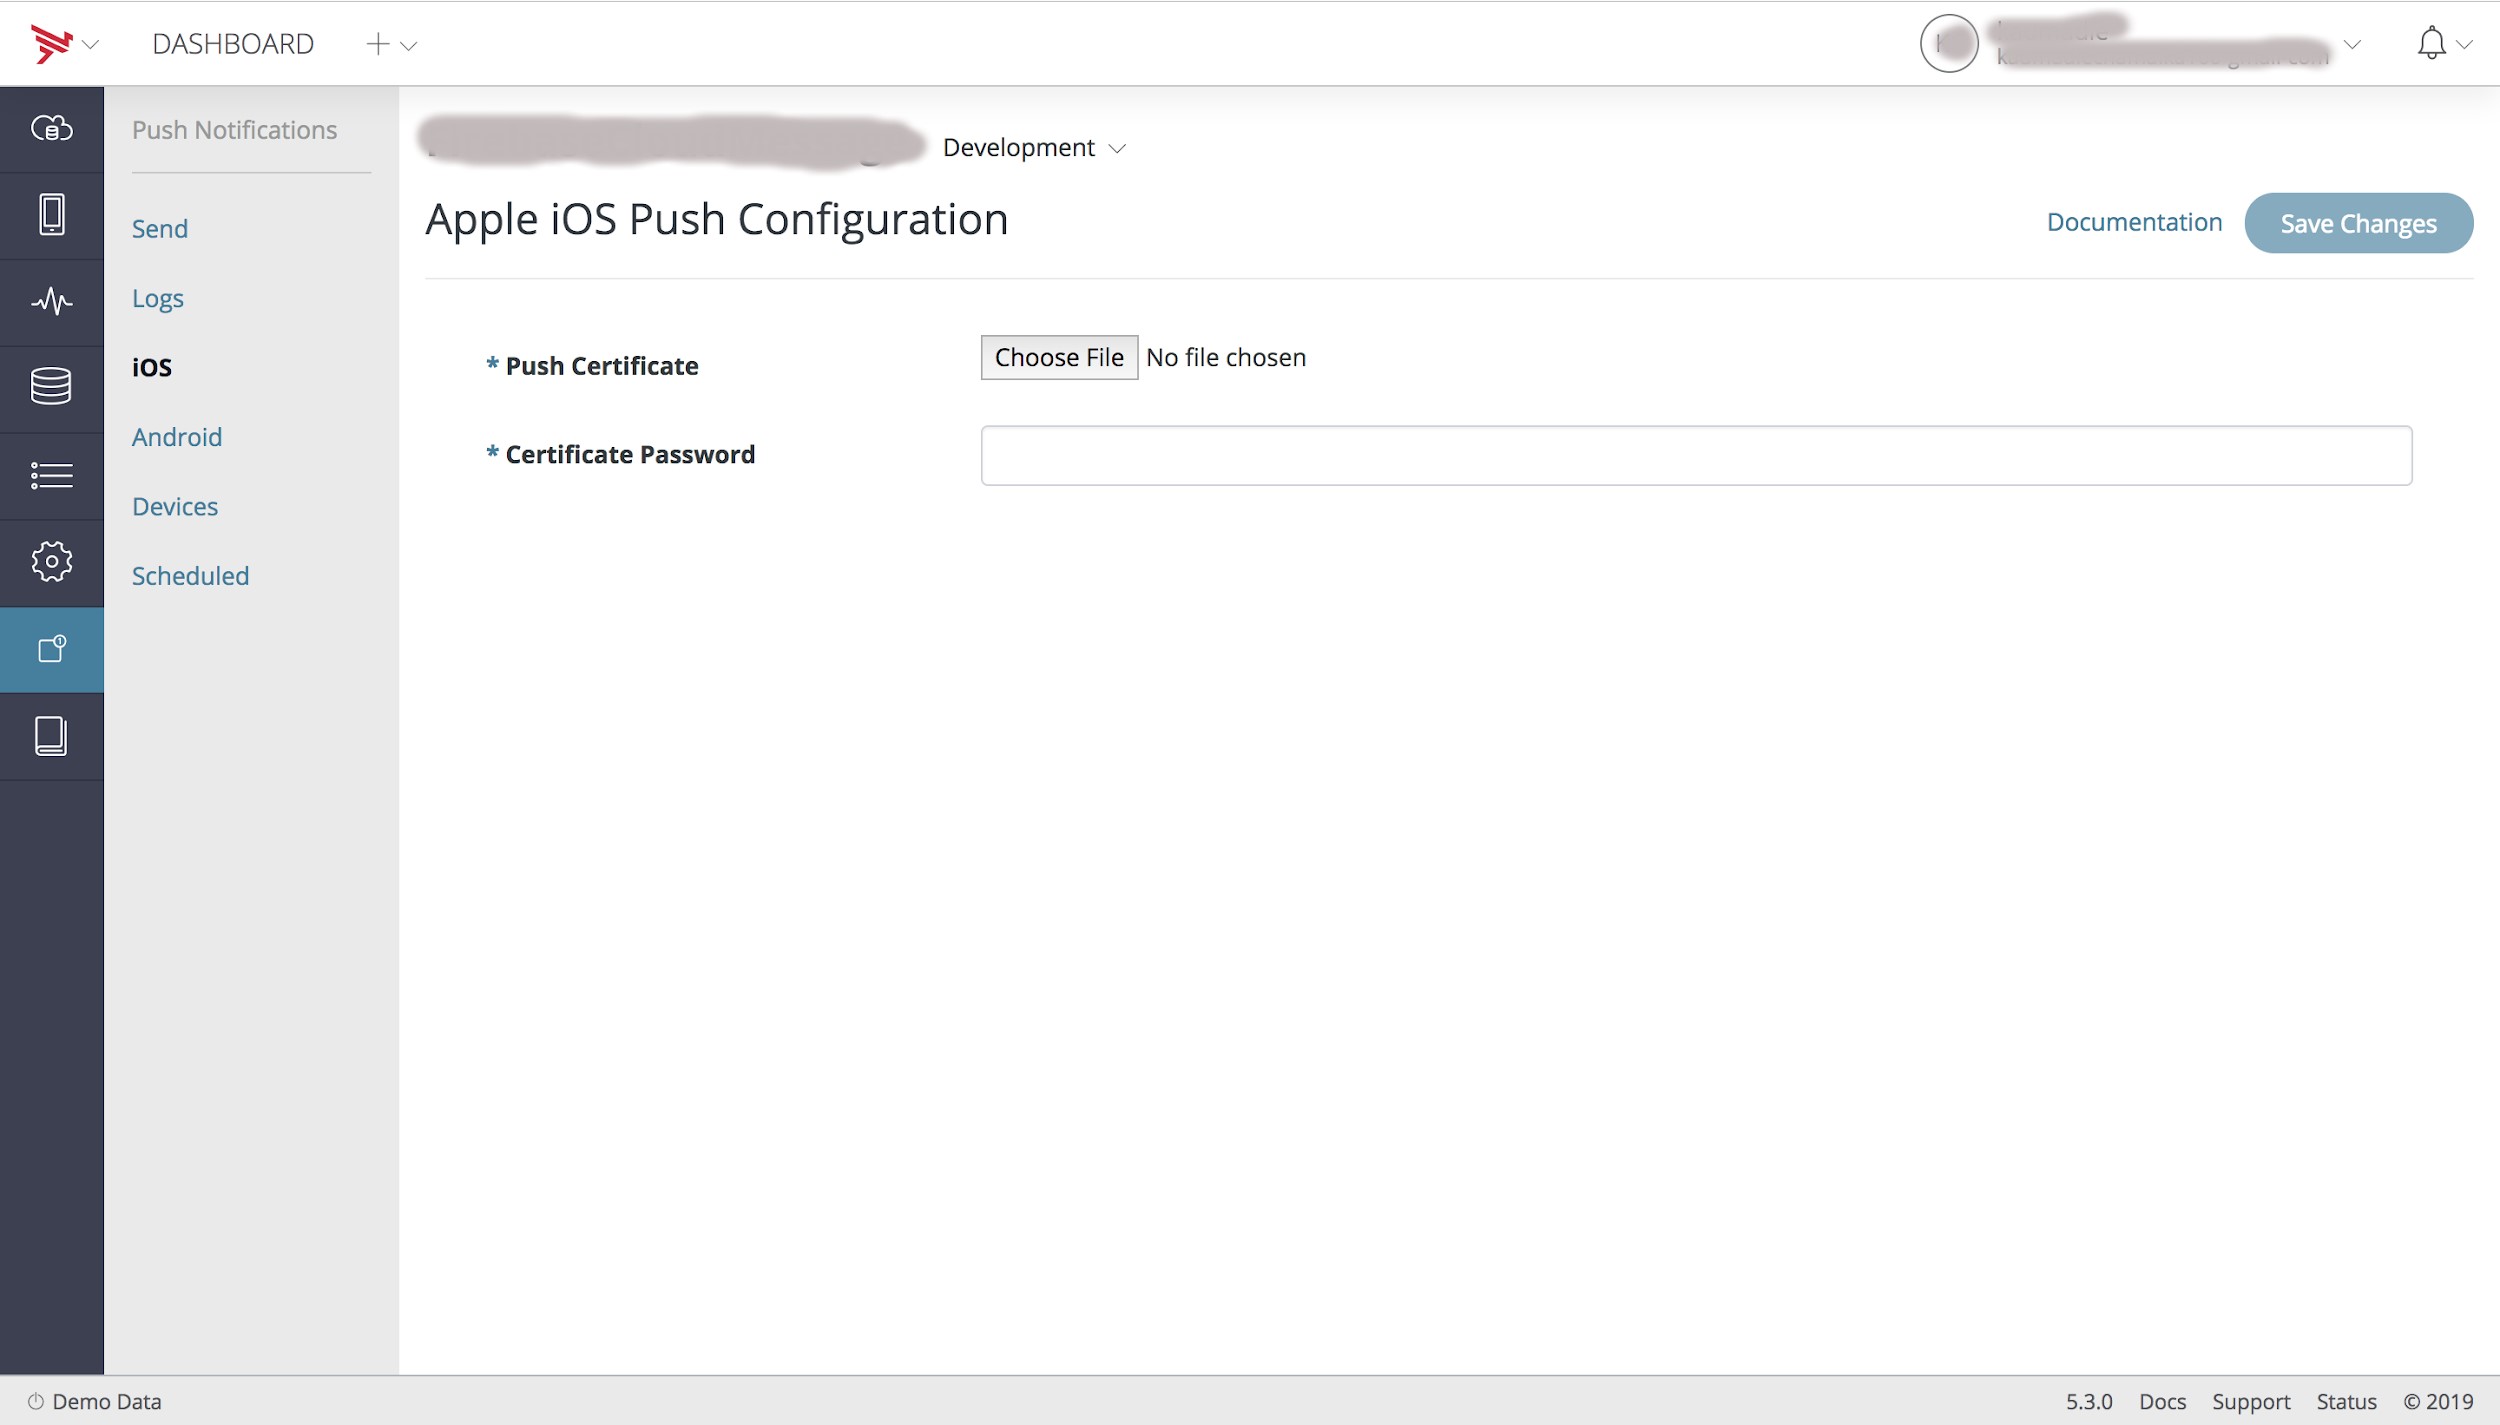
6. Click Save Changes. If the password you entered was incorrect, an error dialog will alert you
To read more about iOS certificates follow this link : http://www.stencyl.com/help/view/ios-certificates-guide
Receive FCM messages with Appcelerator
Call the registerFirebase function to register for push notifications with firebase.
Send FCM messages with PHP

Chamalka Gamaralalage
Associate Software EngineerDeveloping a Custom Audit Trail and a Notification Service for a Workflow Based Serverless Application on AWS
READ ARTICLE
Human Emotions Recognition through Facial Expressions and Sentiment Analysis for Emotionally Aware Deep Learning Models
READ ARTICLE
