Cloud Infrastructure Management using AWS SSM (Part 02) — Patch Manager and Inventory
This is the second part of my AWS Systems Manager (SSM) blog series. The first primarily talked about how we can use RUN command and how to create a SSM Managed instance.
This blog primarily will be focusing on another capability of SSM, which is the Patch Manager.
Introduction
AWS Patch Manager automates the process of patching your managed instances with both security and other types of updates.
It enables you to scan instances for missing patches and apply missing patches individually or to a patch group.
For security patches, Patch Manager uses patch baselines that include rules for auto-approving patches within days of their release, as well as a list of approved and rejected patches.
You can use Patch Manager to apply patches for both operating systems and applications running on them.
The Patching Process
There are five main steps that need to be followed in the Patch Manager patching process (see Figure 1).
- Define a Default Patch Baseline
- Create Patch Groups
- Create a Maintenance Window
- Execute the Patch RUN Command
- Compliance Check
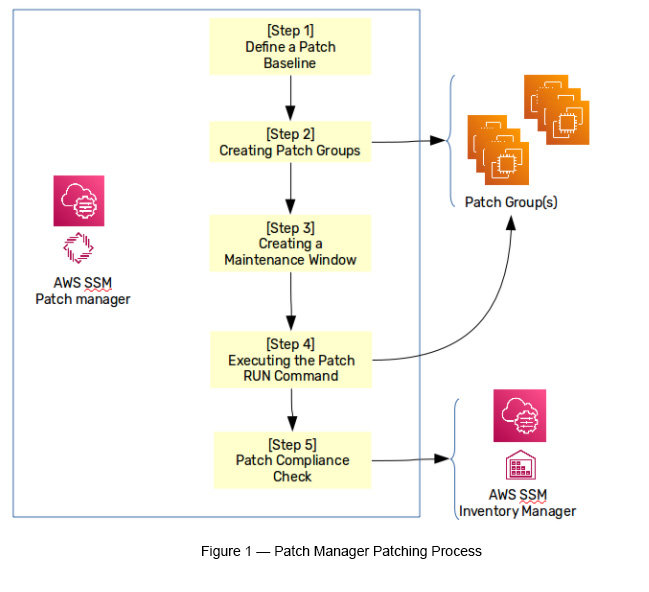
Step 1 — Define a Default Patch Baseline
Patch Manager uses Patch Baselines to define what gets installed. These baselines include rules for auto approving patches within days of their release, as well as a list of approved and rejected patches.
Patch Baselines can depend on the Operating System (OS), which has its own default patch baseline. If an OS has multiple distributions (like in Linux), then you will have multiple default patch baselines for each OS distribution mainly because each distribution has its own software repositories. For example:
AWS-AmazonLinux2DefaultPatchBaseline — For Amazon Linux 2 distribution
AWS-UbuntuDefaultPatchBaseline — For Ubuntu Linux distribution
AWS-DefaultPatchBaseline — For Windows
AWS-PredefinedDefaultPatchBaseline — For Windows (same as above)
AWS-PredefinedDefaultPatchBaseline-OS-Applications — For Windows and MS applications
Step 2 — Create Patch Groups
This defines groups of resources, which act as targets for patching tasks.
Step 3 — Create a Maintenance Window
The maintenance window defines a schedule, duration, targets and tasks. It works as the main coordinator for the whole patching process.
Step 4 — Executing the Patch RUN Command
Execute the AWS-RunPatchbaseline command (the built-in RUN command) with a baseline defined to a given target(s). This process orchestrates the whole patching process with defined targets.
Step 5 — The Compliance Check
Once patches are executed, target groups are checked for any compliance issues. This is basically being managed by the AWS SSM Inventory feature.
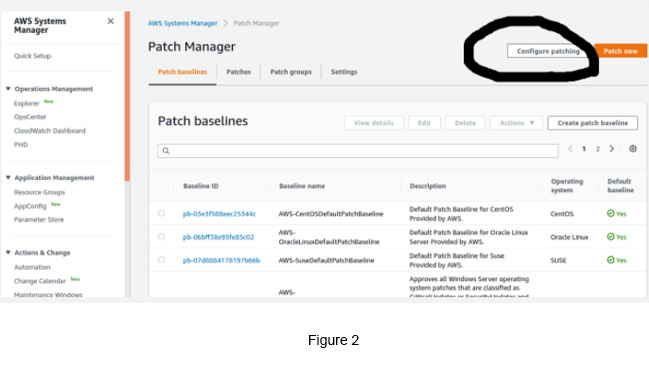
The Patching Process — Sample Demo
Go to SSM -> Select Patch Manager -> Click Configure Patching
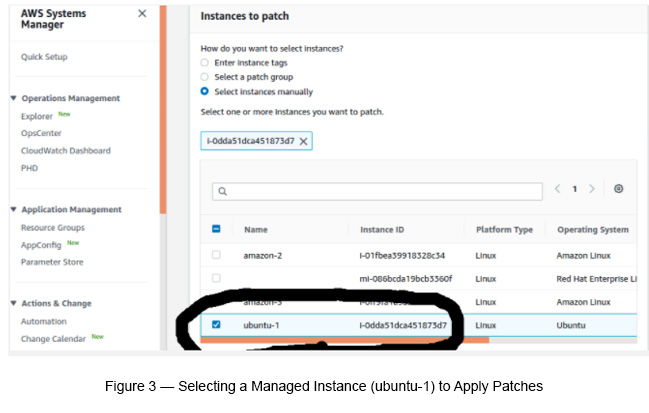
Select instances manually (see Figure 3).
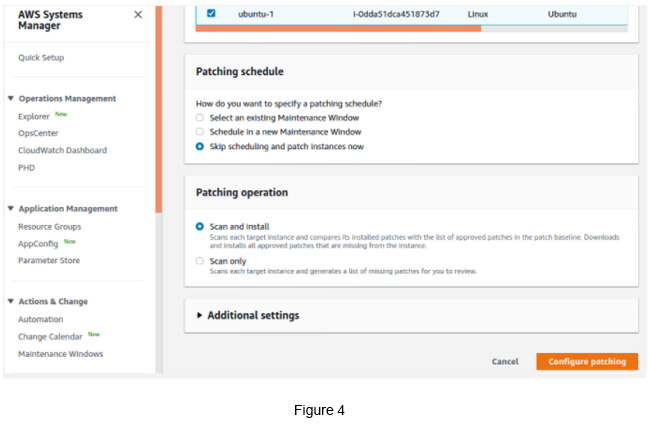
Select Patching Schedule as Skip scheduling and patch instances now.
Use Scan and Install as the Patching Operation (see Figure 4).
Click the Configure Patchingbutton.
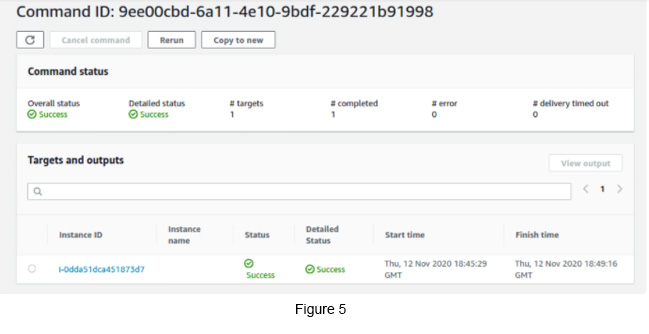
Click the View Details button, which appears on the top of the page. You will get a page like below if the patching process went well (see Figure 5).
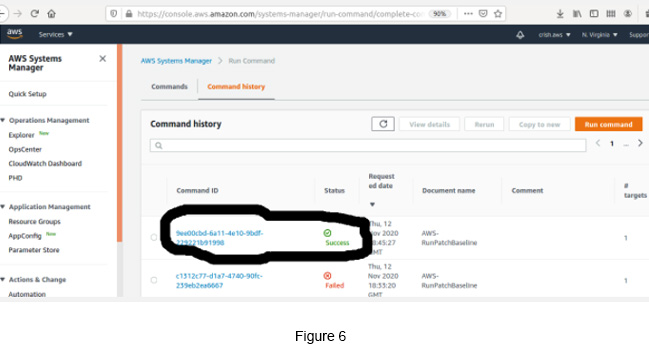
Go to SSM -> Select Command History -> Select the latest Command it processed.
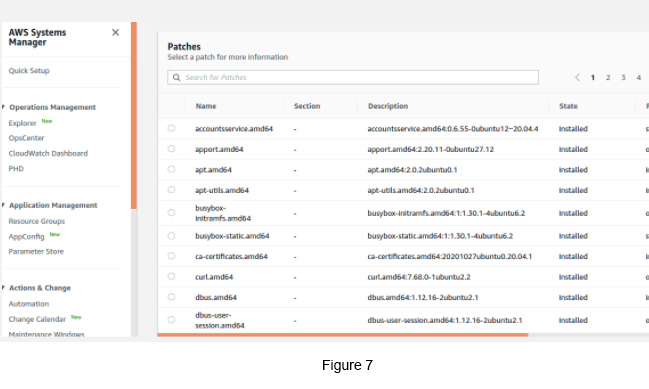
As an alternative, you can go to SSM -> Managed Instances -> select the Managed Instance, which you have applied.
You can see multiple patches applied to the selected managed instance (see Figure 7).
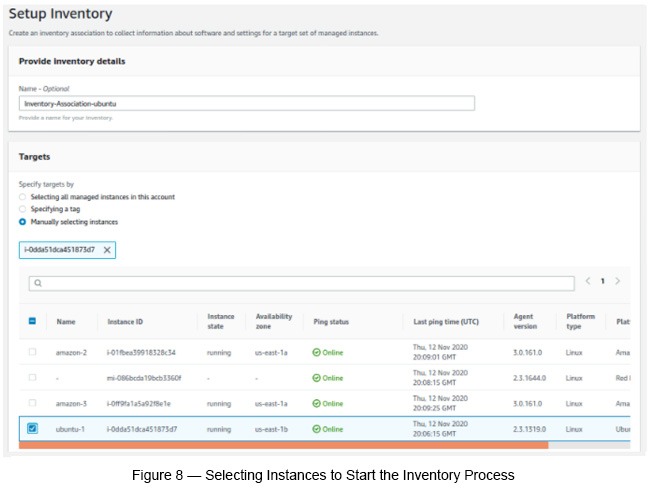
Now start setting up the Inventory to check patching compliance.
Targets: Manually selected resources.
Keep the rest of the field attributes as default and finally click Setup Inventory.
Go to SSM -> Inventory -> Select the instance that you initiated the inventory process.
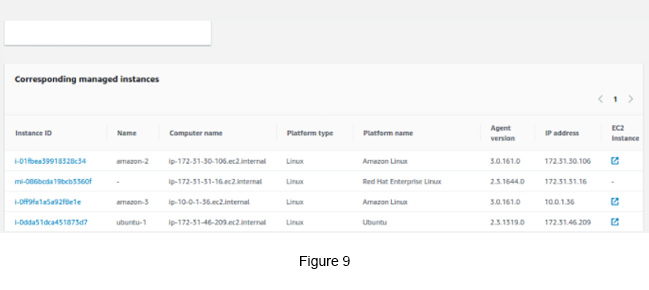
Now, from the above list (see Figure 9), select the managed instance that you started the inventory process.
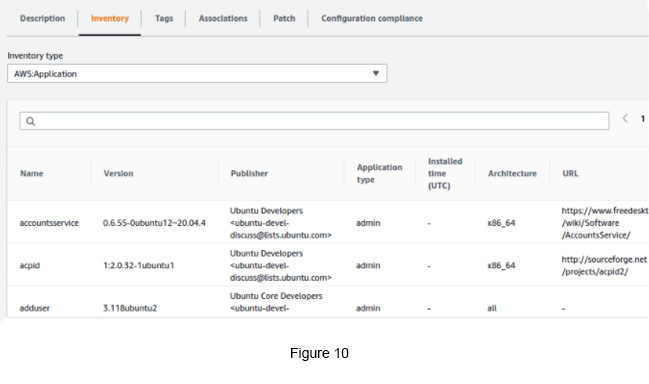
Click the Inventory tab to see the inventory data for the given managed instance. You can select Associations and Patch tabs as well to see all associations and patches (see Figure 10).
Finally, click the Configuration Compliance tab to see the patch compliance (see Figure 11).
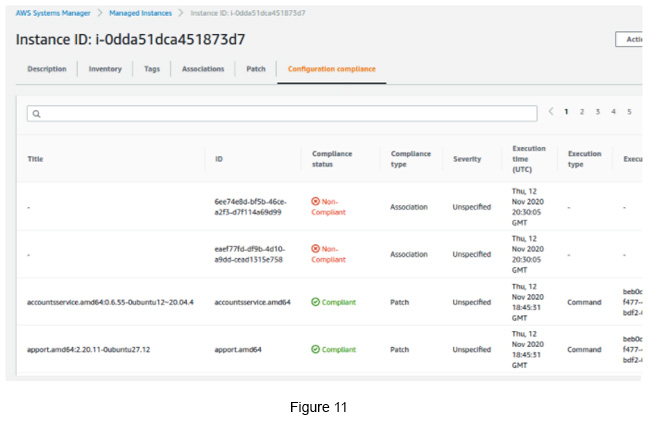
it appears that the patching has not been applied as expected. Now you can investigate further into this to find the root cause of the issue.
Hope this blog gave you some insights into how patching can be done and how SSM can help you along this journey.

Crishantha Nanayakkara
Vice President - TechnologyDeveloping a Custom Audit Trail and a Notification Service for a Workflow Based Serverless Application on AWS
READ ARTICLE
Human Emotions Recognition through Facial Expressions and Sentiment Analysis for Emotionally Aware Deep Learning Models
READ ARTICLE