AWS Cross Account Access
[Part 02 — Access Between Two AWS Accounts]
In Part 01 of the AWS Cross Account Access blog series, I discussed cross account access between AWS accounts within a given AWS organizational hierarchy.
In this blog article, I will be concentrating on the other aspect of cross account switching, which is role switching between two AWS accounts.
Scenario: You are required to have two AWS accounts (Account A and Account B) with ROOT user access. A user from AWS Account A should be able to access Account B resources (let’s say ReadOnlyAccess).
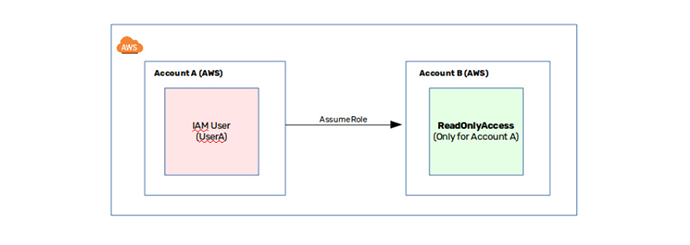
Step 1: Sign-in to Account A and create an IAM user (“userA”) with required permissions.
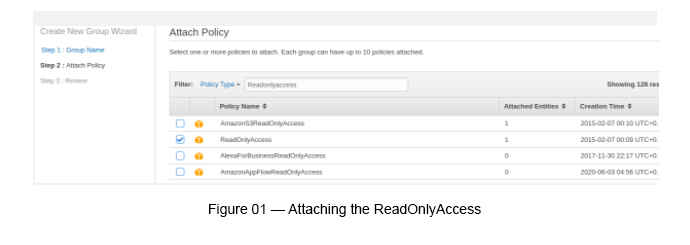
Step 2: Create an IAM Group and create two policies and attach them to the group.
Adding the AWS Managed Policy — With ReadOnlyAccess (see Figure 01).
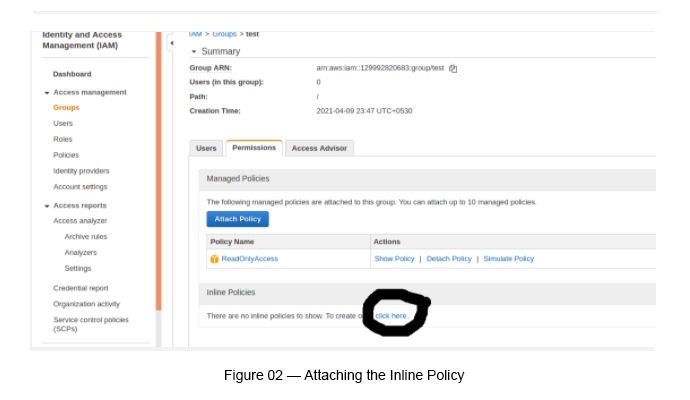
Adding the Inline Policy — With AssumeRole
Once the ReadOnlyAccess managed policy is attached, click the group and add the inline policy by clicking the link, which is under the Inline Policies tab (see Figure 02).
Once you click the above link, a Policy Generator page appears.
Click the “Select” button under the Policy Generator. Then you will see the following figure (figure 03).
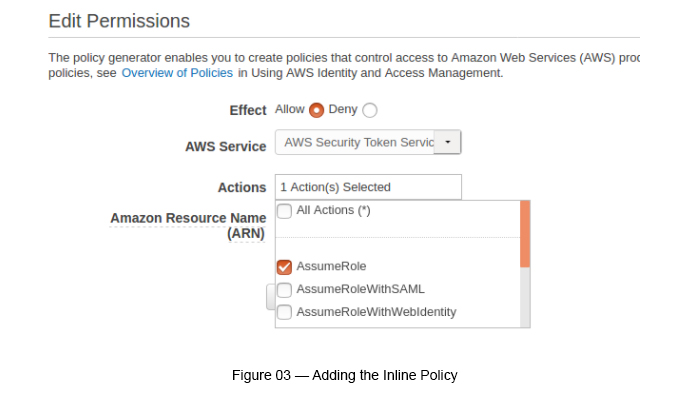
Click “Inline Policy” and use the Policy Editor to add the STS Assume Role to the Inline Policy.
Select the following parameters while creating the inline permissions
- Select Policy Generator → Effect = “Allow” → AWS Service = “AWS STS” → Actions = “AssumeRole” → ARN = “*” → Click “Add Statement” → Click “Next Step” → Click “Apply Policy”
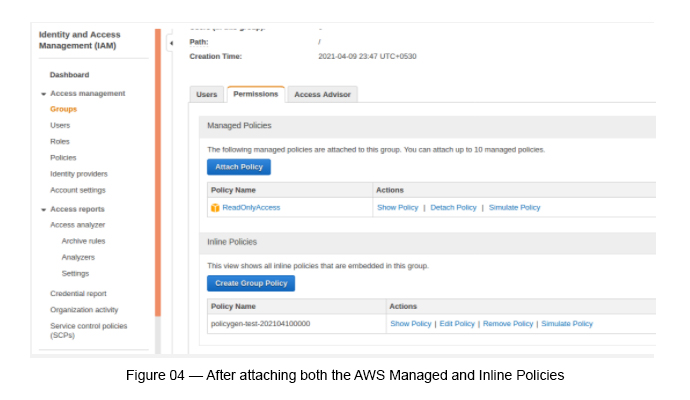
Once both the policies are created, the group policies can be listed as below (see Figure 04).
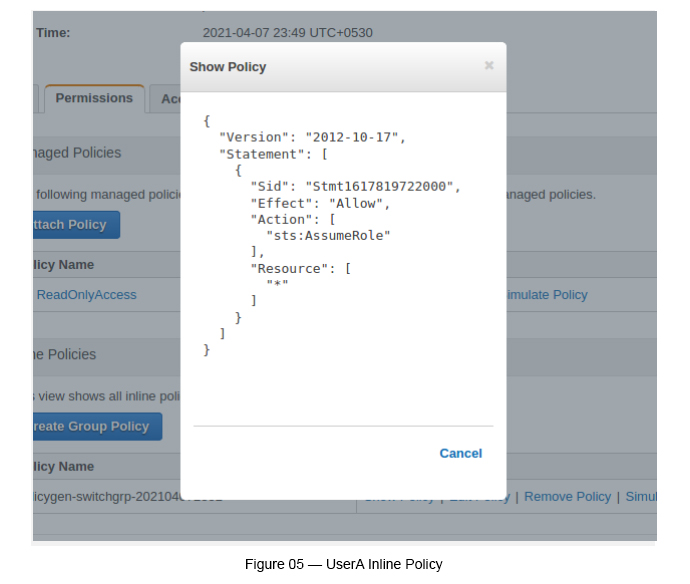
Click “Show Policy” under Inline Policies to check the the inline policy we added (see Figure 05).
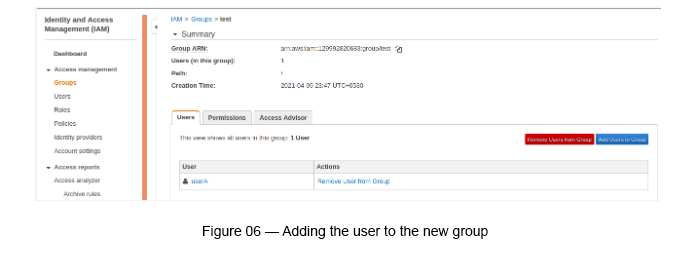
Now you are required to add the user that you have created to the above IAM Group in order to apply the required permissions to the user that we have chosen (see Figure 06).
Step 3 : Sign-in to Account B and create a Role (this is to connect Account A users to Account B).
Go to IAM → Select “Roles” → Click “Create Role” → Select “Another AWS Account” → Enter the 12-digit account ID (this is the Account ID of AWS Account A)→ Click “Next” and add permissions (here you can add “ReadOnlyAccess”) → Click “Next” and give a “Role Name” and a “Description” (RoleName = “SecurityReadOnlyRole”)
Go back to “Roles” and see the newly created Role and its Permissions and Trust Relationships. Under Permissions you can see “ReadOnlyAccess” and under “Trust Relationship” (see Figure 07 to see the edited relationshop) you can see the Trusted AWS account (Account A — Account ID)
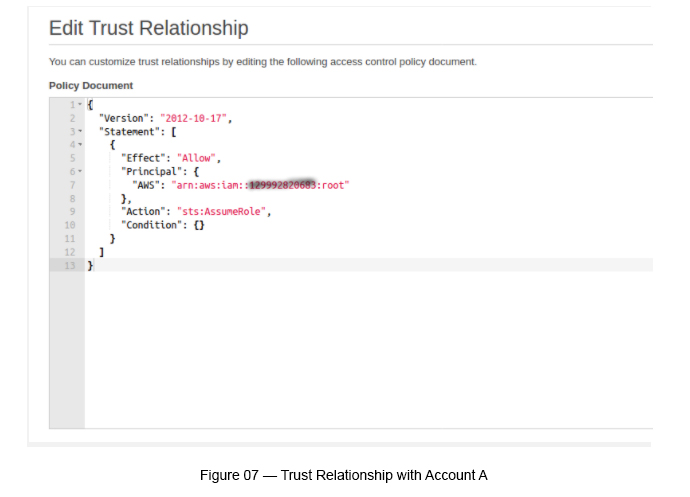
The above configuration confirms that any user from Account A can access Account B resources in the “ReadOnly” mode.
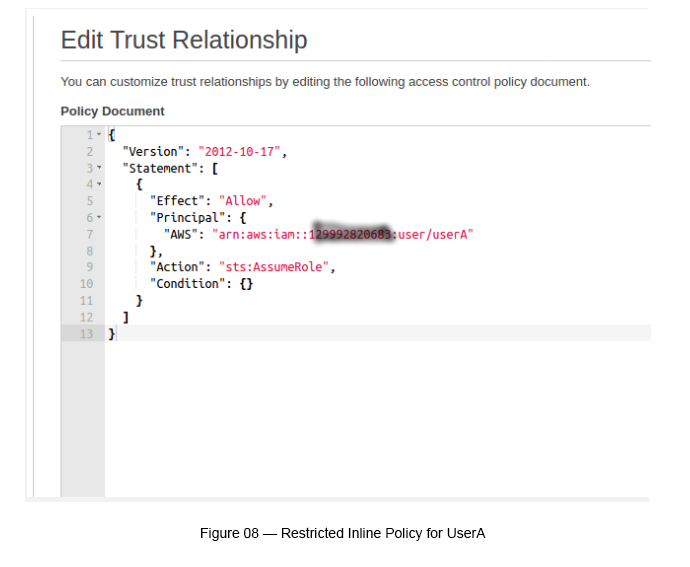
However, if we want to restrict this access to only UserA in Account A, we should be able to do that by changing the above inline policy by replacing the user name to “UserA” (see Figure 08).
Step 4: Now it is the time to login to “userA” in AWS Account A.
Step 5: Go to “Switch Role” and enter the following details:
- Account ID (account ID of AWS Account B)
- Role (“SecurityReadOnlyRole”)
- Display Name and Color can be anything you like

If all turns out okay, you will be logged into Account B without using its username/password credentials and it is purely on the roles defined.
If you want, you can always go back to Account A and vice versa.
References

Crishantha Nanayakkara
Vice President - TechnologyDeveloping a Custom Audit Trail and a Notification Service for a Workflow Based Serverless Application on AWS
READ ARTICLE
Human Emotions Recognition through Facial Expressions and Sentiment Analysis for Emotionally Aware Deep Learning Models
READ ARTICLE
