Cloud Infrastructure Management Using AWS Systems Manager (SSM) — Part 01
[Registering SSM Managed Instances and RUN Command]
SSM in Hybrid Environments
Managing a hybrid Cloud infrastructure using a traditional tool set could result in many challenges.
- Typical traditional IT tool sets are not built for Cloud
- Deploying multiple products is a significant overhead
- Multiple licensing costs
- The complexity
Therefore, having a single or unified infrastructure management tool for both AWS (EC2) and on-premise is a great need, especially if you have a hybrid Cloud infrastructure. AWS Systems Manager (AWS SSM) can help you in this journey.
Configuring your hybrid environments with SSM enables you to do the following:
- Create a consistent and secure way to remotely manage your workload from a single location using the same tools or scripts
- Centralized access control for all actions can be performed on your servers and VMs by using AWS IAM (Identity and Access Management)
- Centralized auditing and your view into actions performed on your servers and VMs by recording all actions in AWS CloudTrail
- Centralized monitoring by configuring CloudWatch Events
So, now let’s dive into some of the SSM capabilities.
SSM Capabilities
SSM is coupled with multiple capabilities (see Figure 1).
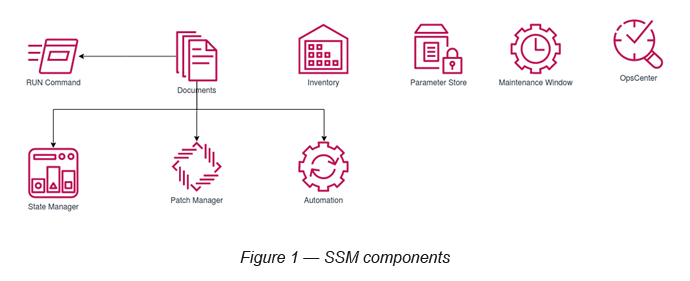
- RUN Command
- State Manager
- Inventory
- Maintenance Window
- Patch Manager
- Automation
- Parameter Store
- Ops Center
Of these capabilities, SSM Document is a core SSM component, which can be used by some of the other SSM capabilities as well.
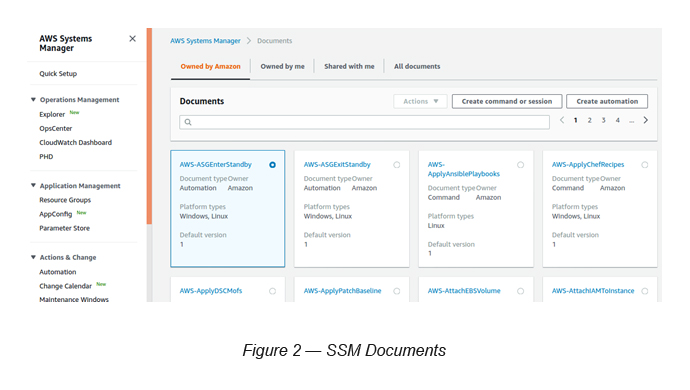
SSM Document
SSM comes with dozens of pre-written Documents (in JSON/YAML) to perform certain instance-based infrastructure management tasks. You can create your own Documents too (see Figure 2).
Go to SSM -> Select Documents (under Shared Resources)
The RUN Command
Let’s explore how we can use the SSM RUN Command to execute certain SSM Documents.
P.Note: We do not use any on-premise servers/VMs here.
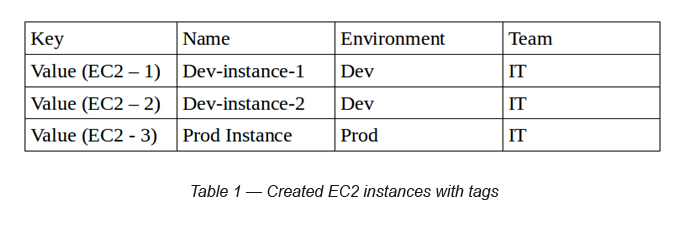
Step 1 — Create a set of EC2 instances
Create three (Amazon Linux 2) EC2 instances with following tags on them (see Table 1). Make sure to add a Security Group for all of them with no inbound ports attached to it (later we can add ports, if required).
Step 2 — AWS Systems Manager Agent installation
AWS Systems Manager Agent (SSM Agent) is a piece of Amazon software (you can download it from GitHub and see!) that is installed and configured on an EC2 instance or an on-premise server. The agent processes requests from the Systems Manager service in the AWS Cloud, and then runs them, as specified in the request. Having this installed on your instances, is a prerequisite to processing them as SSM managed instances.
If you’ve created instances with Amazon Linux AMIs, this is pre-installed. If not, you need to manually install it in the instances [3].
Since we consider all our instances as Amazon Linux AMIs, we can skip this step.
Step 3 — Create Resource Groups
Once you tag your resources, you are able to create Resource Groups based on the tags defined.
Click “Resource Groups” in the top navigation bar and define your Resource Group criteria (see Figure 3).
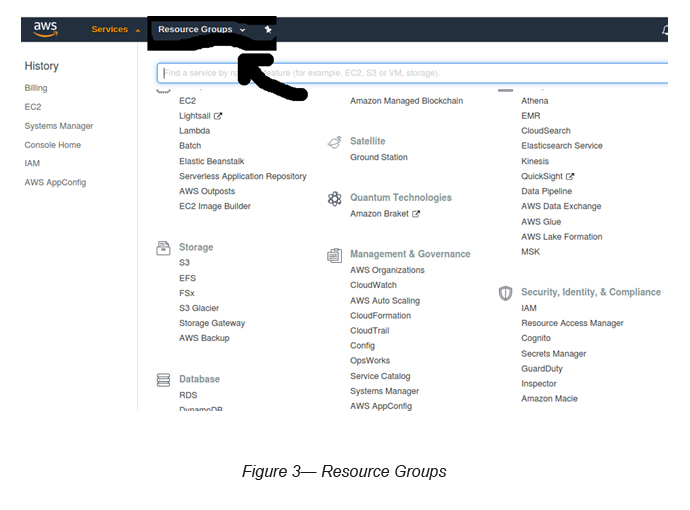
Select “Resource Groups” → “Create a Group” → “Group Type” = “Tag Based”
Select “Resource Types” → AWS::EC2::Instance
Select “Tags” → Select “Environment” → Select “Dev” -> Click “Add” -> Click “Preview Group Resources”
The above will show you the EC2 instances for the determined criteria.
Under “Group Details” → Key in a Group Name (i.e. RG-EC2-Dev) -> Click “Create Group”
This will create a Resource Group of EC2 instances for Development activities (“Dev” tag).
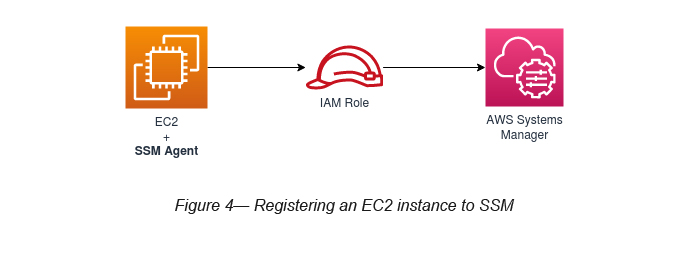
Step 4— Register EC2 instances to SSM
Once the SSM Agent is installed and Resource Groups have been created, you are required to create an IAM Role and attach it to the EC2 instance (see Figure 4).
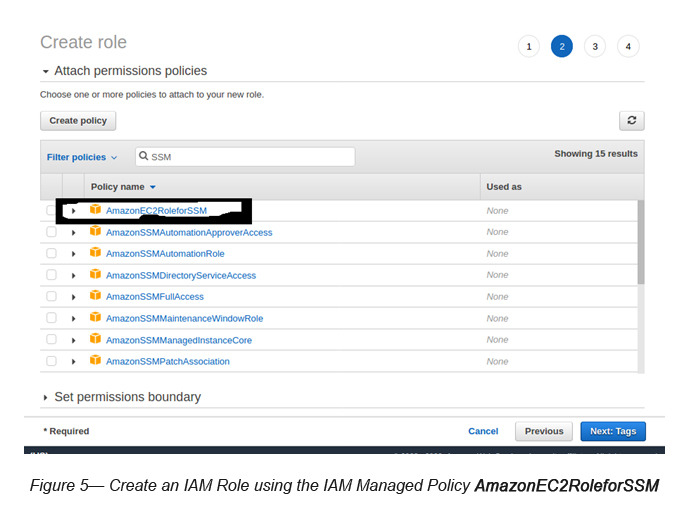
While creating the IAM Role, you should attach AmazonEC2RoleForSSM IAM Managed Policy to it (see Figure 5).
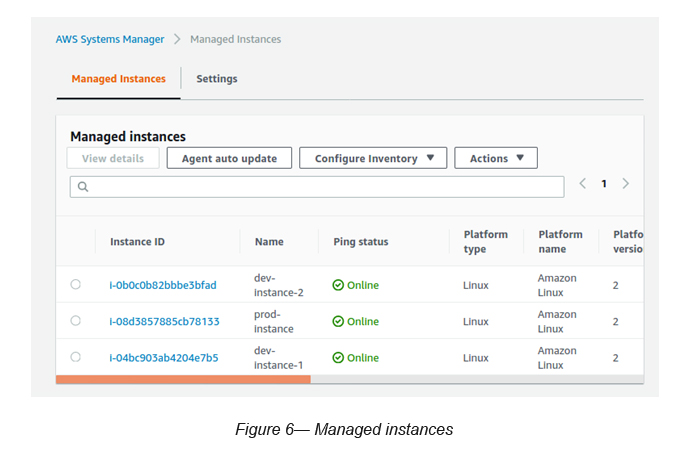
Now, the selected EC2 instances are registered with SSM as Managed Instances.
Go to Systems Manager -> Managed Instances (see Figure 6)
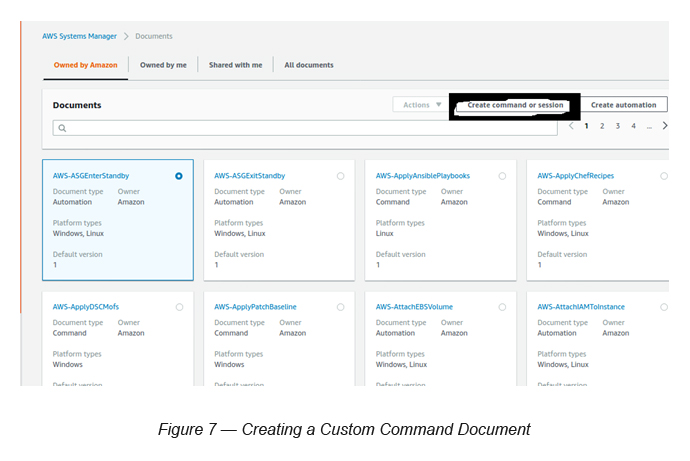
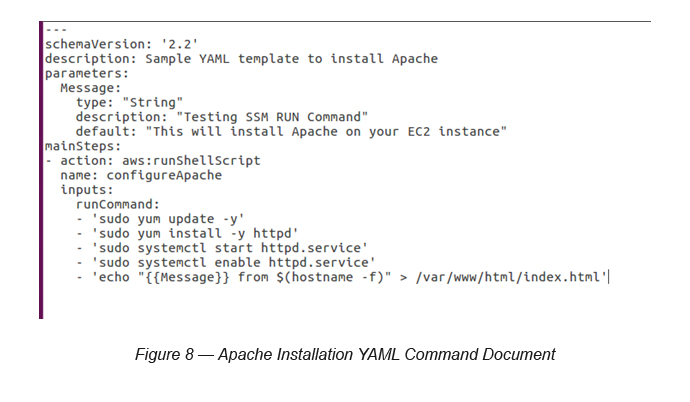
Step 5— Create a Custom Command Document to install Apache (httpd) on all Dev instances
In order to demonstrate the RUN command capability, let’s try and install Apache on the Dev instances. We are using a custom RUN Document to execute this task.
Prerequisite: Make sure to open port 80 on the security group attached to Dev instances. This is to allow us to access the instances’ Apache installation via its public IP.
Go to SSM -> Select Documents -> Click Create Command or Session button
Use the following parameters to fill the page:
Document Name: ApacheInstallationDoc (you can give any name here)
Type “Target Type” (Optional) = /AWS::EC2::Instance
Select “Document Type” as “Command Document”
Select “YAML” as the “Document Content” and paste your “Document” (see Figure 8) to the editor and click the “Create Document” button in order to create the Document.
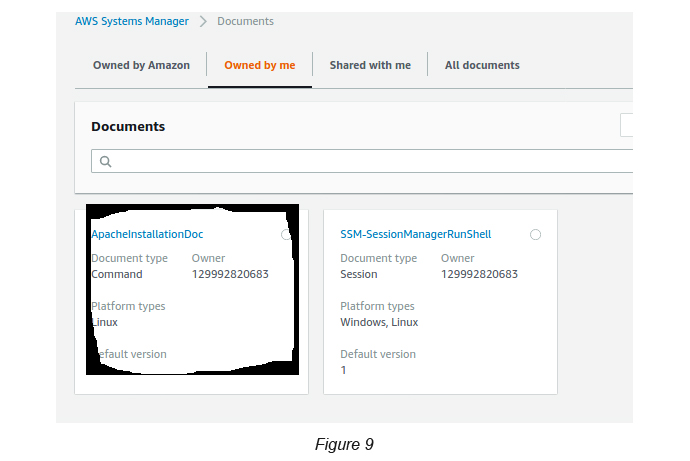
Once the document is created, you will be able to see your Document under Documents “owned by me” (see Figure 9).
Step 6— Run the created Custom Command Document
Go to SSM -> Go to Documents -> Select Documents “owned by me” -> Select the Document created by you (ApacheInstallationDoc)
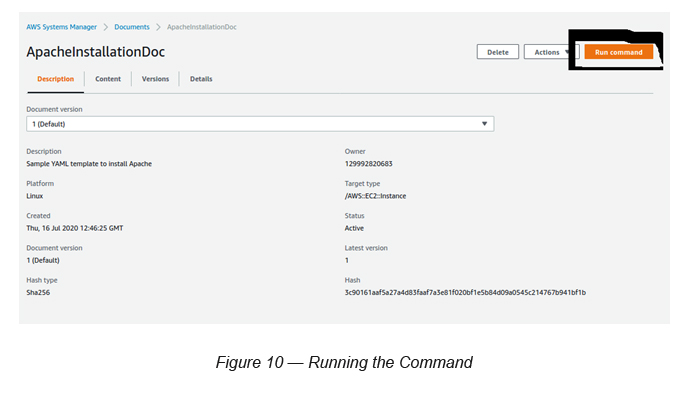
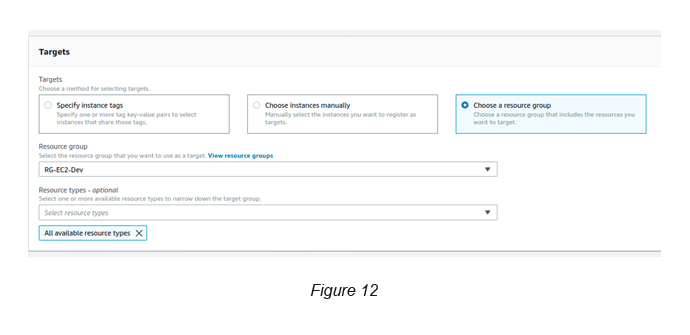
Click the Run a Command button. Then, you will see the below screen with the selected Document details (see Figure 11).
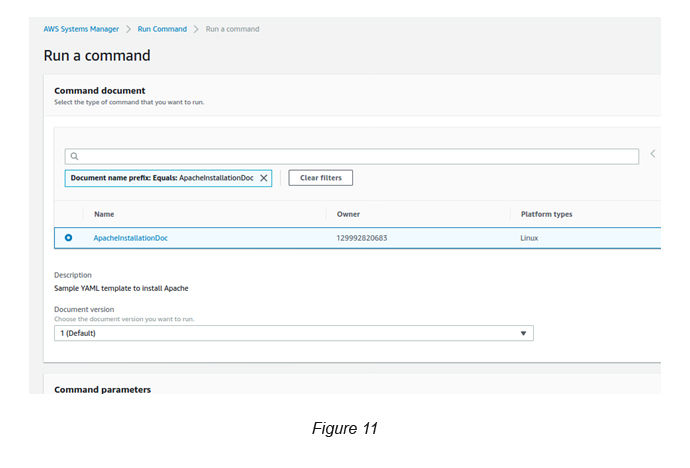
Select the Document you created and then select the version (version 1).
Command Parameters (message) : You can override the default text here, if you wish (optional).
Targets: Select “Choose Resource Group”, which you created previously (RG-EC2-Dev).
Resource Types: <All available types>
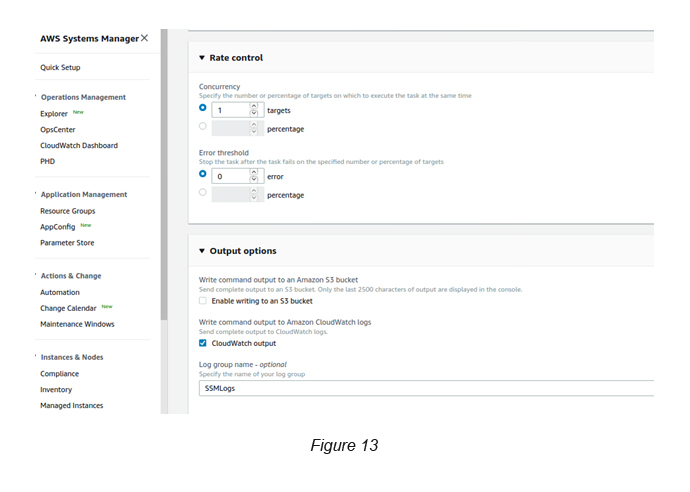
Rate Controls: Select “1” and the Concurrency.
Output Options: Disable “Enable writing to a S3 bucket” → Enable “CloudWatch Output” → Key in the Log Group Name SSMLogs.
Finally, click the Run button.
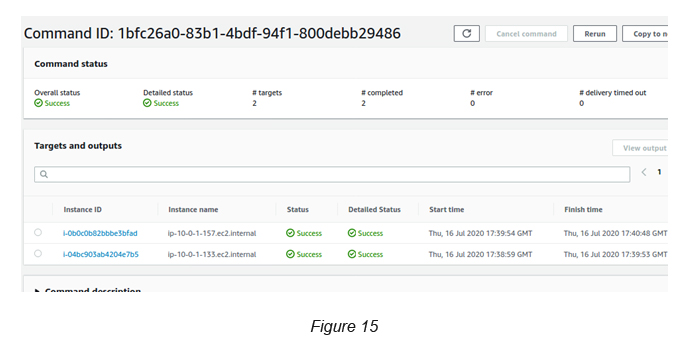
Once you complete the above, you can see the instances executing the command across all EC2 instances that you’ve selected (see Figure 14).

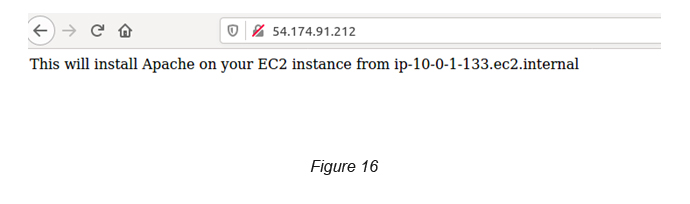
Once this is completed, you can try out the public IP of all of the instances to verify that the Apache is installed properly (see Figure 16).
References
- Managing Modern Infrastructure in Enterprises [Re:Invent 2018] : https://youtu.be/D91UJ69dcww
- Deep Dive with Amazon EC2 Systems Manager: https://youtu.be/BmpxZsk9N48
- Manually install SSM Agent on EC2 instances for Linux: https://docs.aws.amazon.com/systems-manager/latest/userguide/sysman-manual-agent-install.html
- Amazon EC2 Systems Manager YouTube Playlist: https://www.youtube.com/playlist?list=PLhr1KZpdzukeH5jKyYi55ef9tEWAllypB

Crishantha Nanayakkara
Vice President - TechnologyDeveloping a Custom Audit Trail and a Notification Service for a Workflow Based Serverless Application on AWS
READ ARTICLE
Human Emotions Recognition through Facial Expressions and Sentiment Analysis for Emotionally Aware Deep Learning Models
READ ARTICLE