AWS Inspector
In brief, we will be discussing a method to conduct vulnerability assessments for EC2 Instances. Let’s go!
An Overview
Amazon Inspector is a vulnerability assessment service for your Amazon EC2 instances and the applications running on those instances.
It uses an on-host agent (Inspector Agent) to analyse the configuration and behaviour of operating systems and applications to identify potential security exposures like common vulnerabilities and insecure configuration settings.
It can basically carry out two (02) main functions:
- Network Assessment: [network reachability]
- Host Assessment: [common vulnerabilities and exposures, CIS benchmarking, security best practices, runtime behaviour analysis]
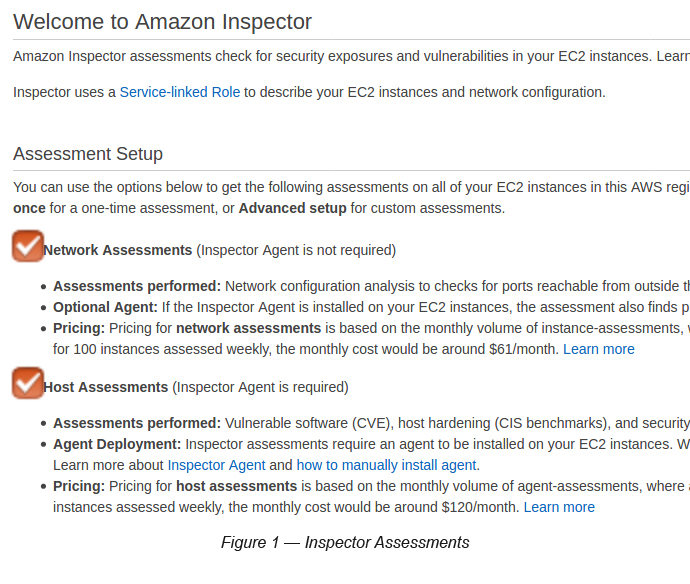
As you can see in Figure 1, in order to do these assessments, especially the host assessment, you are required to install the Inspector Agent on the assessed EC2 instance.
Inspector Agent Installation
There are two methods you can activate Inspector in your EC2 instances.
- Manual Installation on EC2
- Using the Inspector Target
Manual Installation on EC2 (Linux)
You can follow the below steps in order to install the Amazon Inspector Agent on a Linux based EC2 instance.
Step 1: Create an EC2 instance (t2.micro, Amazon Linux)
Step 2: Download the Agent installation script by executing one of the following:
Step 3: Install Inspector Agent
$ sudo bash install
The above command will install the Amazon Inspector Agent in your EC2 instance.
Using the Inspector Target
Step 1: Creating another instance to showcase the Inspector Target option
Use the following parameters while creating the EC2 instance.
Create an EC2 instance (t2.micro, Amazon Linux instance)
Security Group (Open port SSH(22) and HTTP(80))
Add two Tags (Name → MyInstance2, Inspector → true)
Assign EC2SSMFullAccess IAM Role to the EC2 instance (SSM is used for Inspector installation in this example)
Step 2: Creating an Inspector Target
This step will define a set of EC2 target instance(s). It will filter the EC2 instances with the tag “Inspector →true”.
Go to AWS Console → Select Inspector → Click Assessment Targets → Click the Create button to create an assessment target.
Name : EC2AssessmentTarget
Do not check the All Instances check box. Use the Tag Inspector as the key and select true as the value
Check the Install Agents check box and finally click Save to save the target
Once you click the Save button, you can see the following (see Figure 2) with a SUCCESS message citing that your action has successfully installed the Inspector Agent in the selected EC2 instances using the SSM RUN Command. As you know, you did this without even a sign-in to the SSM page.
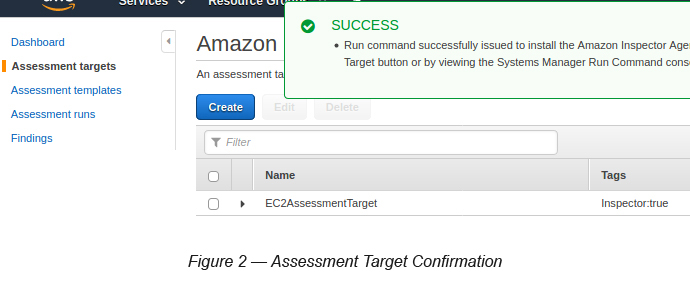
To confirm this, you can select Assessment Targets again and select the correct Assessment Target that you created a little while ago (see Figure 3).
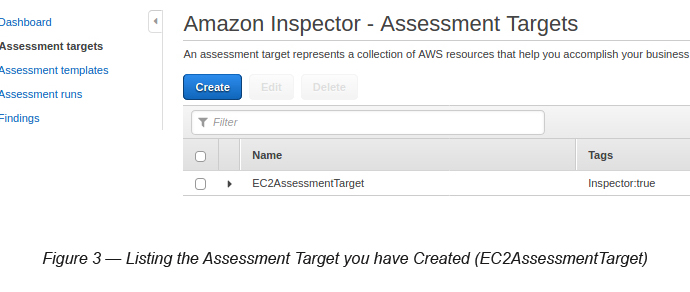
Now click the small arrow key in front of EC2AssessmentTarget → Click the Preview Target button and if all went well, you will see a HEALTHY instance on the screen (see Figure 4).
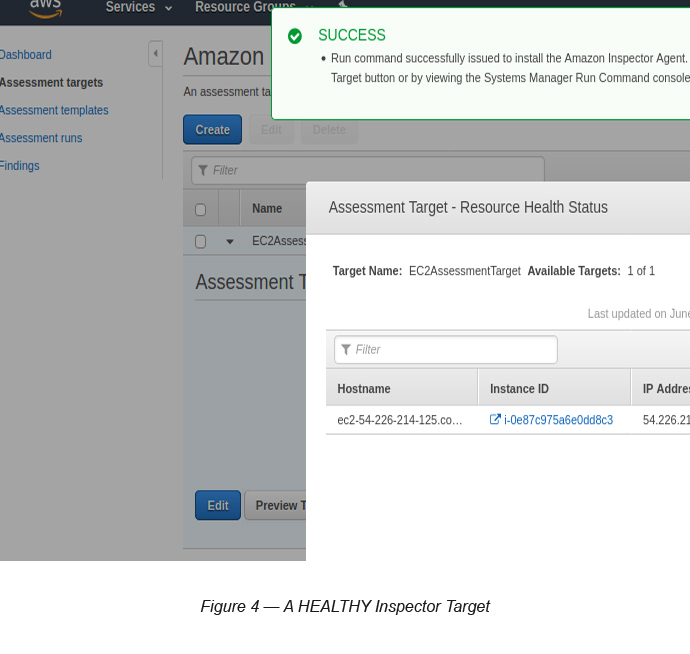
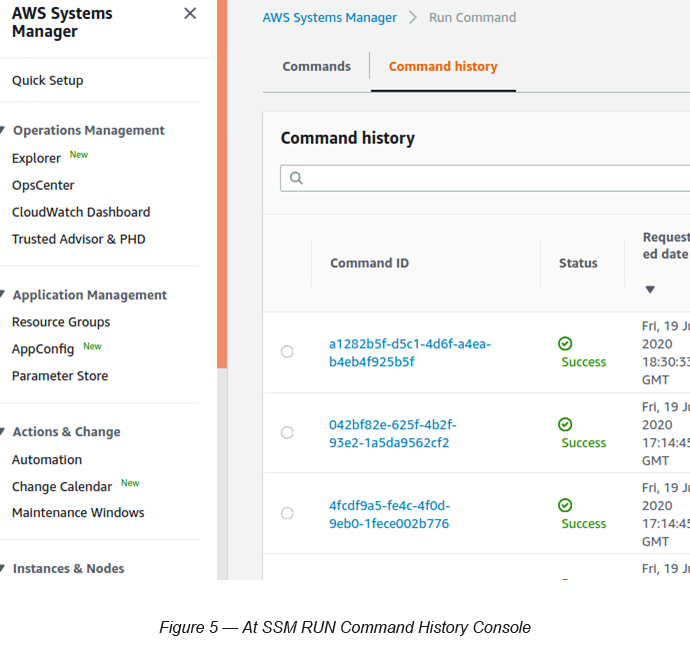
You can further validate this by browsing the SSM RUN Command options.
Go to System Manager → Select Run Command (under Instances and Nodes)→ Select Command History
If you see “AmazonInspector-ManageAWSAgent” is a “Success” that means the SSM RUN Command has been executed successfully (see Figure 5).
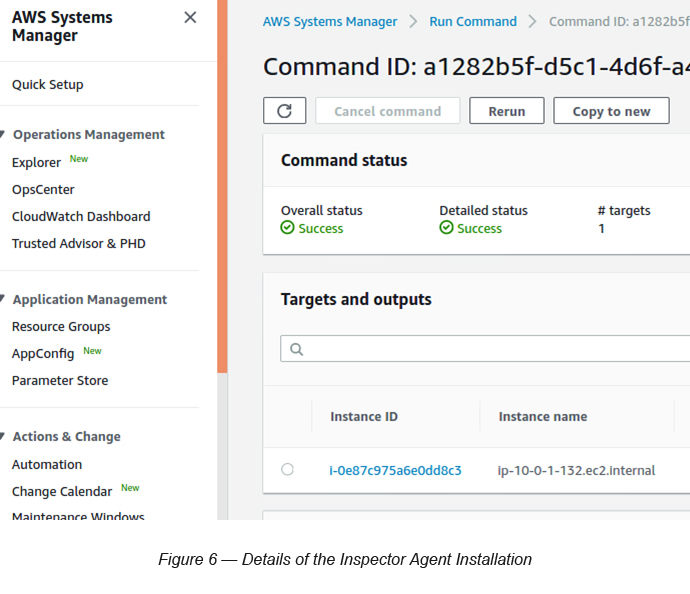
Now click the Command ID of the “AmazonInspector-ManageAWSAgent” command. You will see more details relating to the installation (see Figure 6).
Now you have selected an Inspector Target with EC2 instances Inspector Agent installed in them. It is high time for us to do a few assessments on them.
For this, we need to create an Inspector Template.
Step 3: Creating an Inspector Template
Name: MyAssessmentTemplate
Target Name: EC2AssessmentTarget
Rules Packages:
<Select All 04 available packages>(Network Reachability, Security Best Practices, Common Vulnerabilities and Exposures, CIS Operating System Security Configuration Benchmarks)
Duration: 1 hour (recommended)
SNS Topic: <Not required>
Tags: <Select Tag Name Inspector and its value true>
Attributes:<Not required>
Assessment Schedule: <Not required> — uncheck this field
After you input the above details (see Figure 7), you can click Save to save the Assessment template.

Step 4: Analysing the Results Using Assessment Runs
After letting it run the assessment for 1 hour, you can analyse the assessment results by viewing the Assessment Runs link.
Go to Inspector → Select Assessment Runs
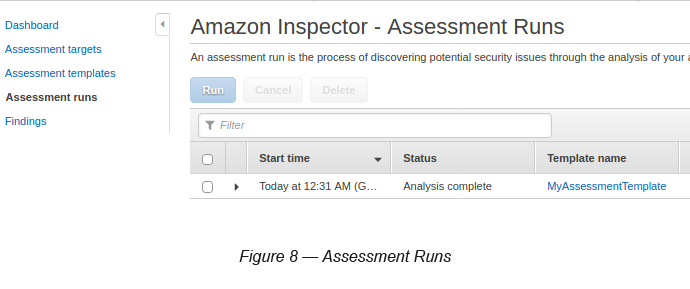
Click the small arrow next to the assessment run (see Figure 9).
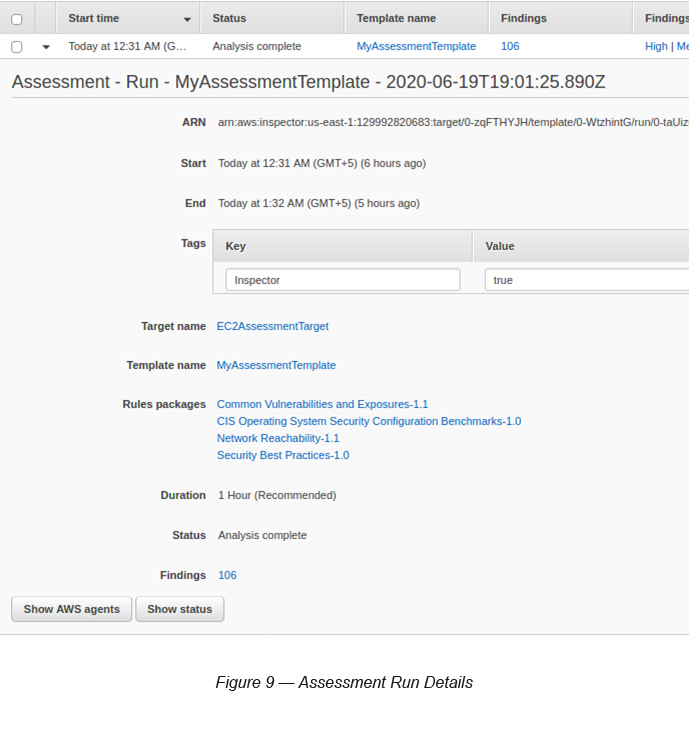
Click the Show Status button (at the bottom of the screen on Figure 9) to see the current status of the assessment (see Figure 10).
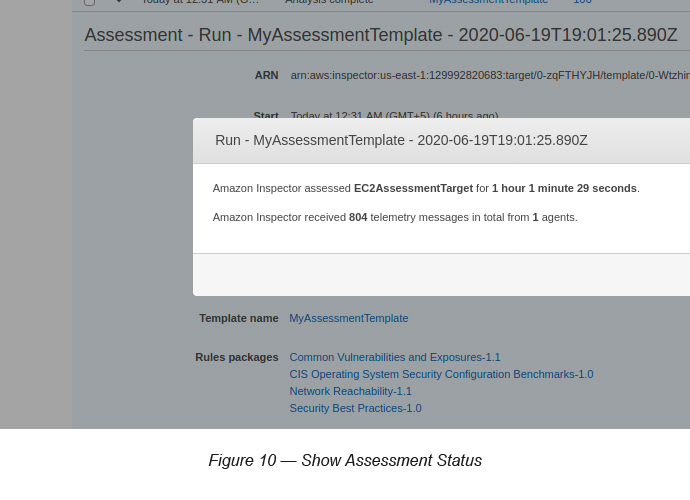
The above says,
Amazon Inspector assessed EC2AssessmentTarget for 1 hour 1 minute 29 seconds. Amazon Inspector received 804 telemetry messages in total from 1 agent.
Now press the Close button and go back to the Assessment Runs page and click the Show AWS Agents button. Here, AWS Agent refers to the EC2 instance that you are assessing (see Figure 11).
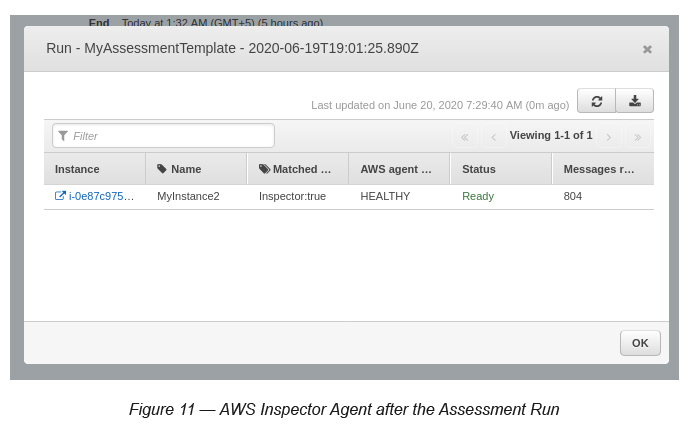
According to the above, the AWS Inspector Agent has completed its assessment and is ready for use.
Step 5: View Findings
After a cycle of the assessment run relating to the EC2 instance (Inspector Agent) selected, now it is the time to view the findings of the assessment run.
Go to Inspector → Select Findings (see Figure 12)

You can see in the above scenario there are 106 findings shown. It appears that most of them are CIS Recommendations at the OS level. If you click on (the right arrow) any of the findings, you will be able to obtain details of the findings and the recommendation steps as well.
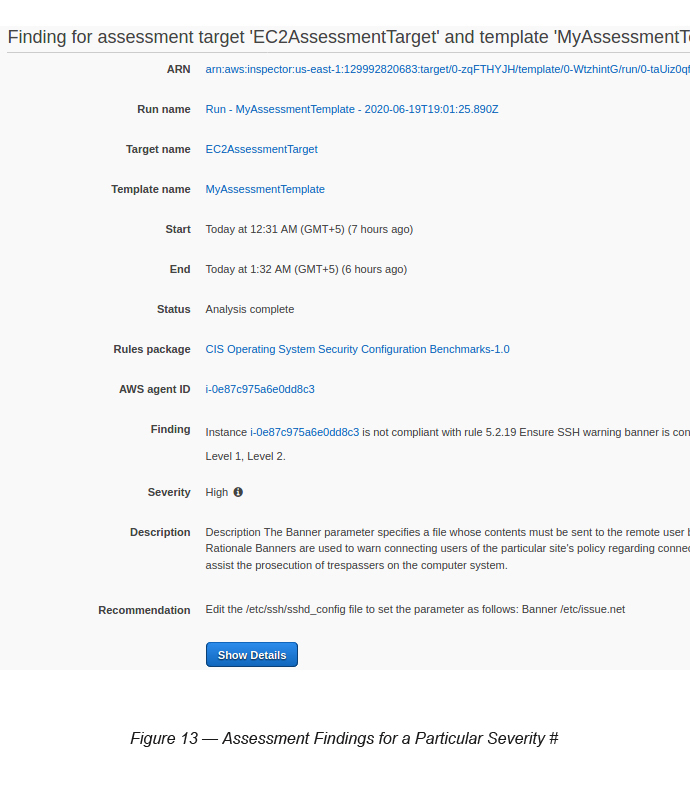
Based on this, it appears that the issue was reported from the CIS Operating System Security Configuration Benchmark 1.0 Rules package. Guess the instance has many OS level issues to be rectified in terms of security vulnerabilities.
References
- Inspector Getting Started Guide : https://docs.aws.amazon.com/inspector/latest/userguide/inspector_getting-started.html
- Installing Amazon Inspector Agents : https://docs.aws.amazon.com/inspector/latest/userguide/inspector_installing-uninstalling-agents.html

Crishantha Nanayakkara
Vice President - TechnologyDeveloping a Custom Audit Trail and a Notification Service for a Workflow Based Serverless Application on AWS
READ ARTICLE
Human Emotions Recognition through Facial Expressions and Sentiment Analysis for Emotionally Aware Deep Learning Models
READ ARTICLE