AWS Web Application Firewall (WAF)
[Highly Configurable and Scalable, Cloud Native web application Layer-7 firewall giving you the first line of defense]
There are many security threats that exist today in a typical enterprise distributed application.
- DDoS: Flood Attacks (SYN Floods, UDP Floods, ICMP Floods, HTTP Floods, DNS Query Floods), Reflection Attacks
- Application Vulnerabilities: SQL Injections, Cross Site Scripting (XSS), Open Web Application Security Project (OWASP), Common Vulnerabilities and Exposures (CVE)
- Bad Bots: Crawlers, Content Scrapers, Scanners and Probes
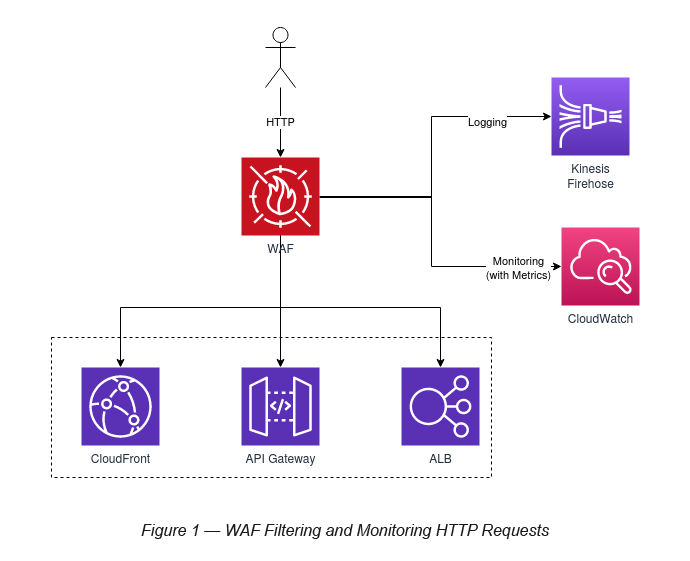
Of these, AWS WAF can be used to handle security threats such as SQL injections and Cross Site Scripting (XSS) in a typical web application.
The web application HTTP requests can be routed via AWS WAF and then forwarded to either of the AWS services.
- AWS CloudFront (Global Service)
- AWS API Gateway (Regional Service)
- AWS Application Load Balancer (Regional Service)
Logging and Monitoring of WAF is handled by Kinesis Firehose and CloudWatch, respectively.
Web ACL
When WAF associates with any of the above three AWS services, it associates with a Web ACL. A Web ACL is a fundamental component of WAF, which defines a set of rules for any of these services (see Figure 2).
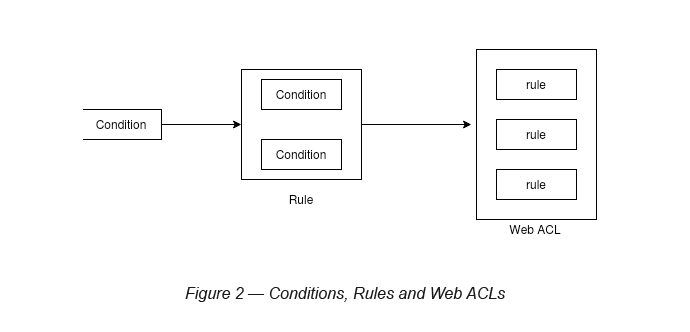
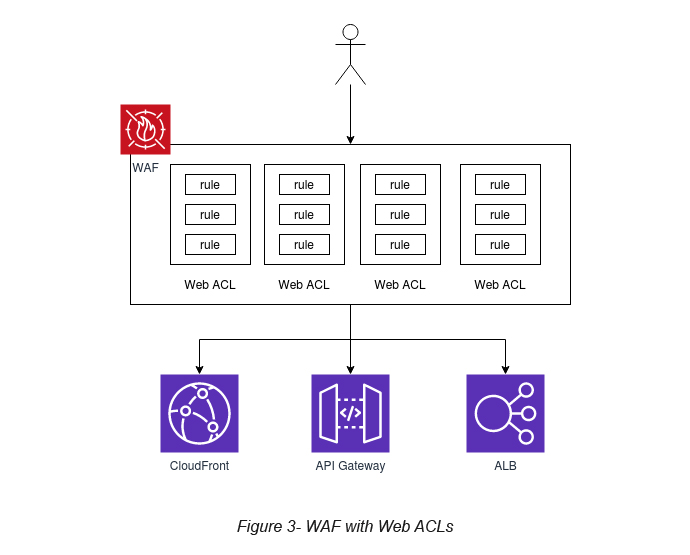
As mentioned, a Web ACL is a collection of rules. A rule is a collection of conditions (see Figure 3).
How to create a Web ACL in WAF?
In order to demonstrate the WAF capability, it is always good to go through a simple scenario that can showcase its capability. Here, I am going to block a CloudFront distribution, which I created sometime ago. So, if you are trying this out, please make sure you have one of the services (CloudFront, API Gateway or ALB) already created.
P.Note: You can try out one of my other Auxenta VP Talks blogs to get an understanding of how to create your own CloudFront distribution on AWS [3]. This should be able to help you out if you’re not already familiar with CloudFront.
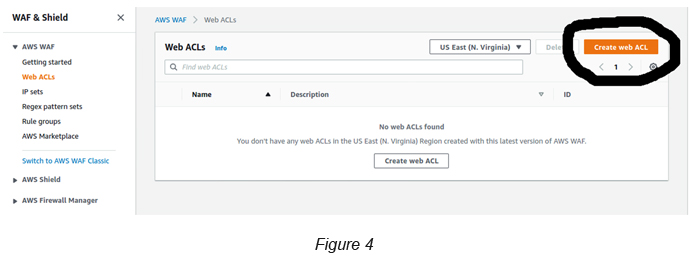
Task 1: Describe a Web ACL and associate it to AWS resources
Go to AWS WAF → Web ACLs → Click the Create Web ACL button (see Figure 4).
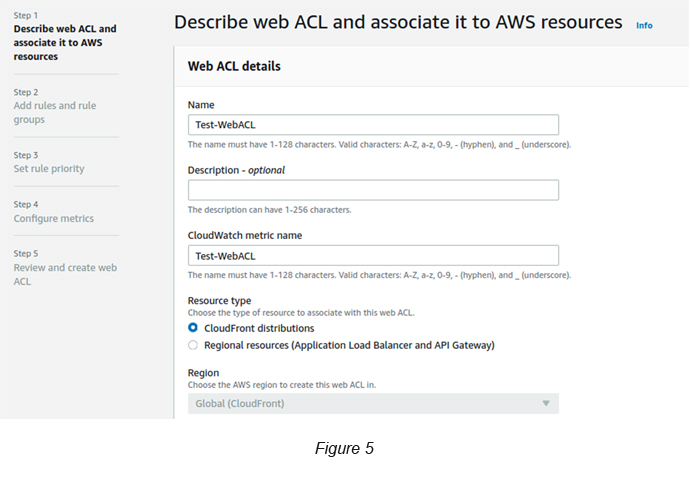
Give a name to the Web ACL and associate a Resource Type to it. Here we are associating a CloudFront distribution (see Figure 5), which I have created previously. You can attach this to not only CloudFront but ALB and API Gateway as well.
P.Note: If you select CloudFront, then you need to select “Global” as the scope since it is a Global service. If you select either ALB or API Gateway, you will have to select a region where the associated resource is located.
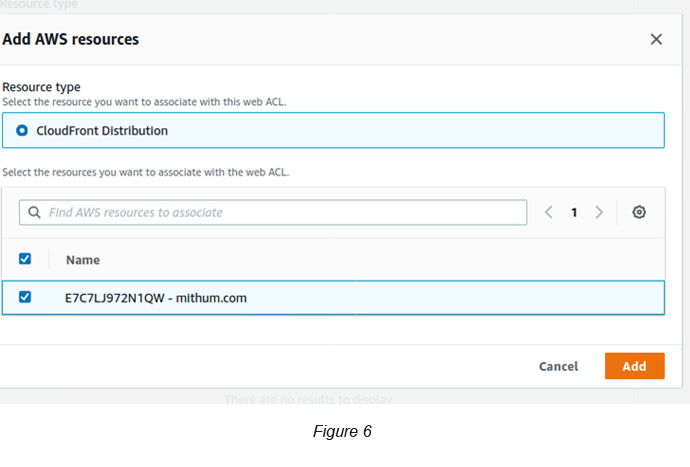
Click the Add AWS Resources button to associate the CloudFront Distribution that you created previously (see Figure 6).
Click the Next button and you will be directed to another page to add your rules to Web ACL. We will skip this for the moment allowing us to do it at a later stage.
Select Allow for the Web ACL Action as well.
(P.Note: Web ACL Action defines what you are going to do when the defined rule is active.)
Leave Set Rule Priority as it is and click Next.
Leave Configure Metrics as it is and click Next.
Finally review your selections and click the Create Web ACL button.
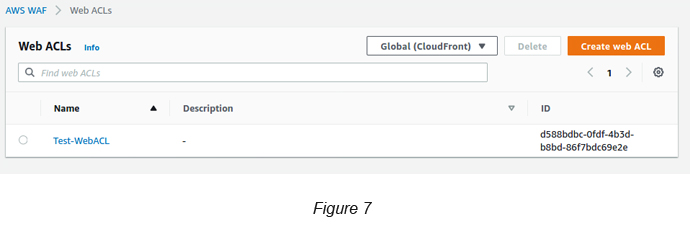
The above will create a Web ACL without any rules. If you go back to the Web ACL link, you should be able to see the below view. Make sure to not select a region and instead to select Global (CloudFront) in the top dropdown in order to see your created Web ACL (see Figure 7).
However, even if you’re able to see the created Web ACL, the CloudFront propagation for this update will take a bit of time. You can see this if you visit the CloudFront console page. Allow for some time to complete the CloudFront propagation before you proceed to the next step.
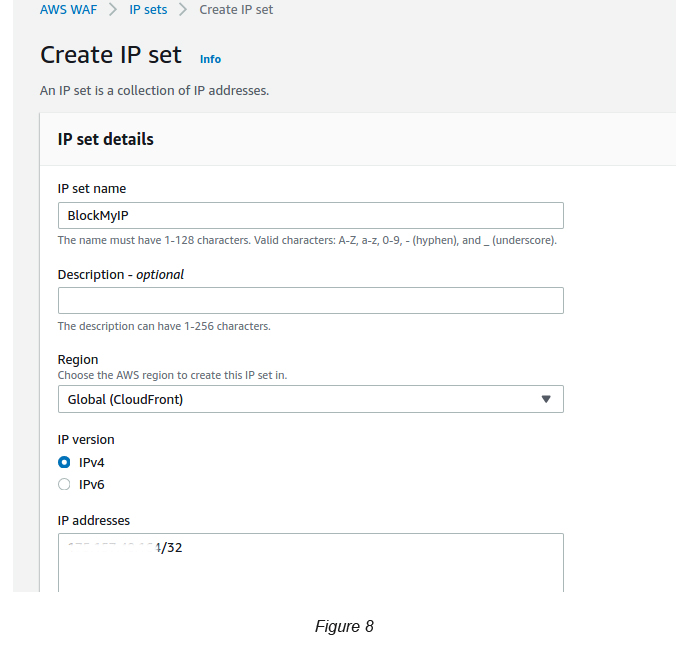
Task 2: Add a condition to block my IP address
Go to AWS WAF → IP Sets → Click the Create IP Set button.
Select IPv4 and give your IP address with /32 as the postfix. If you are not sure how to get your network’s public IP, you can type “What is my IP” on Google. It’s that simple (see Figure 8)!
Task 3: Add a rule to the created condition
In order to create a rule, you need to create a Rule Group.
Go to AWS WAF → Rule Group → Click the Create Rule Groups button (see Figure 9)
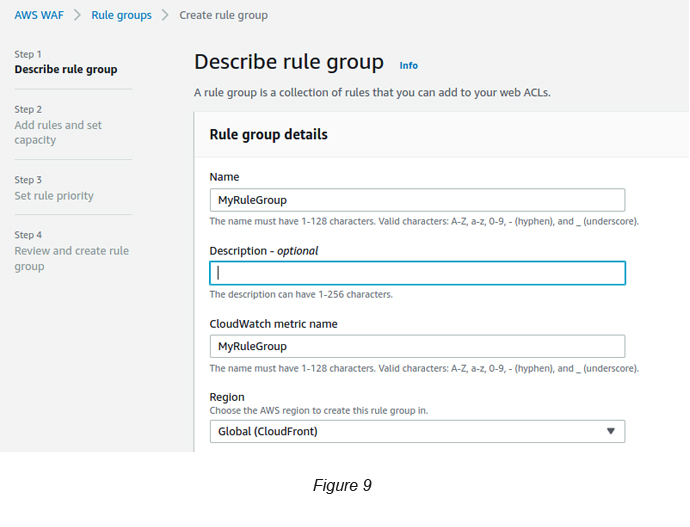
Click Next → Click the Add Rule button → Set the following parameters to create a Rule:
Rule Name → MyRule
If a Request → Select Matches the requirement
Statement (Inspect)→ Select Originates from an IP Address In
Statement (IP Set) → Select the IP Set that you created in Task 2
Action → Select Block
Click Next
Select the Rule Priority. This is not required here since you have only one rule.
Finally, review your selections and click Create Rule Group to confirm your rule settings.
Task 4: Add the created rule group/rule to the Web ACL
Go to AWS WAF → Web ACL → Select the Web ACL that you have created → Click Rules tab (see Figure 10).

You can see the Web ACL still does not have its rules attached.
Click the Add Rules button dropdown → Select Add my own rules and rule groups.

Give a name for the rule that you’re specifying here (see Figure 11).
[P.Note: I strongly feel the new WAF UI has some issues relating to some of its fields. Having to define the rule name twice is a good example of this. Once under the Rules Group and once under Web ACL rule attachments.]
Select the Rules Group that you created from the dropdown and click the Add rule button and then click Save.
Now you can see that the added rule is attached to the Web ACL.
Now it’s time to browse the web URL that you have blocked for your IP. If all is fine and dandy, it should be similar to the below screen (see Figure 12).

If you want to remove the blocking, you can go to the Web ACL and delete the related rule and try the web link again. After a few refresh attempts, you will see that it takes you back to your original site.
References
- Orchestrate Perimeter Security Across Distributed Applications (re:Invent 2018): www.youtube.com/watch?v=ELIiF-jE0y8
- Protecting your web application using AWS Managed Rules for AWS WAF: www.youtube.com/watch?v=ll-uvVgQ3Jg
- Connecting your website securely via AWS Route 53, CloudFront and AWS ACM: https://1billiontech.com/blog_Using_AWS_ACM_with_CloudFront_and_Route_53_
to_Secure_your_Cloud_Domains.php

Crishantha Nanayakkara
Vice President - TechnologyDeveloping a Custom Audit Trail and a Notification Service for a Workflow Based Serverless Application on AWS
READ ARTICLE
Human Emotions Recognition through Facial Expressions and Sentiment Analysis for Emotionally Aware Deep Learning Models
READ ARTICLE